How To Strengthen Pelvic Floor: Anatomy-Focused Guide
To strengthen your pelvic floor, start by getting curious about the anatomy, test your own activation, then layer in targeted moves, sync your breath, and tweak for your life stage. Think of this as your roadmap: it tells you what to do, why it matters, and how to notice early wins.
Quick Overview And Key Actions
This snapshot covers the pillars you’ll lean on to kick off your practice right away.
- Anatomy: Pinpoint the layered architecture of your pelvic floor—pubococcygeus, puborectalis, iliococcygeus, coccygeus, fascia and ligaments that support your core and pelvic organs.
- Assessment: Use simple self-checks to verify you’re firing the right fibers.
- Exercises: Progress from gentle holds to more challenging routines at your own pace.
- Breathing & Alignment: Match a deep diaphragmatic breath to every contraction for stability.
- Modifications: Adapt each move for pregnancy, postpartum recovery, or menopause.
Each piece builds on the last. It’s a smooth progression from understanding the “why” to owning the “how.”
Imagine a busy mom, juggling work and family, who felt a noticeable lift within two weeks by marrying clear anatomical cues with mindful breath.
“I never believed a few minutes of targeted work could change my daily life—now I feel stronger and more confident.” —Sarah, 42
Benefits At A Glance
- Better bladder control in just weeks.
- Early spotting of weak or overactive zones.
- Scalable workouts that fit any schedule.
- A real confidence boost as you track your progress.
When you grasp the muscle map, your mind–body link lights up. Those subtle lifts become impossible to miss.
Quick Wins You Can Feel
- A noticeable lift each time you exhale and squeeze.
- Added control when you cough or sneeze.
- A subtle improvement in posture as your core engages.
For gentle moves that pair perfectly with these actions, check out our guide on low-impact exercises for beginners.
Below is a quick reference to keep your practice focused and purposeful.
Key Actions For Pelvic Floor Strengthening
| Focus Area | Action | Benefit |
|---|---|---|
| Anatomy | Map muscle layers | Improved activation accuracy |
| Assessment | Perform self-test holds | Track baseline strength |
| Exercises | Daily contraction routines | Increased endurance |
| Breathing & Alignment | Diaphragmatic pauses | Better pressure control |
| Modifications | Adjust load per life stage | Safe, consistent progress |
Use this table as your go-to checklist. As you move through the detailed routines ahead, revisit these actions often—you’ll find each session becomes smoother, more effective, and more in tune with your body’s signals.
Next up, dive into anatomy to truly feel those muscles engage and lay the groundwork for sustainable progress.
Understanding Pelvic Floor Anatomy

Imagine your pelvic floor as a gentle hammock stretching from your pubic bone to your tailbone. Underneath lies a mesh of muscles, fascia, and ligaments that team up to keep your organs supported, your bladder in check, and your core rock solid.
The pelvic floor comprises three main muscle groups. On the surface, a ring of superficial muscles encircles the urethra, vagina, and anus. Deeper sits the levator ani complex—pubococcygeus, puborectalis, and iliococcygeus—with the coccygeus anchoring the back. A robust fascial network ties everything to the sacrum and pubis, distributing intra-abdominal pressure.
Getting to know these layers is a game-changer. When you visualize each piece of this network, you’ll pinpoint exactly where to feel the lift during your exercises.
Muscle Layers Explained
You can think of the pelvic floor in two tiers.
- Levator Ani Group:
• Pubococcygeus: Supports urethral and vaginal sphincters, crucial for continence.
• Puborectalis: Forms a U-shaped sling around the rectum, maintaining anorectal angle.
• Iliococcygeus: Bridges lateral walls of the pelvis, adding structural support. - Coccygeus: Anchors the posterior floor and assists with hip extension.
- Fascia & Ligaments: Link muscles to bony landmarks and distribute pressure evenly.
“Feeling each layer engage helps avoid compensation in nearby muscles,” notes PT Emily Roberts.
That web of fascia isn’t just filler—it’s what evens out tension across the pelvis. Tight spots in your inner thighs or perineum can act like a kinked hose, stopping you from getting a full lift.
Common Weakness Patterns
Under heavy loads, the pelvic floor should rise—but often it sags instead. Add a rounded posture and you’ve got a recipe for leaks or discomfort.
Consider a mom lifting her toddler overhead. One day she felt a strange bulge in her pelvis. A few simple posture tweaks and a cue to brace through her deep abs stopped that downward shift. Now she knows to keep her spine long and her core active whenever she’s hoisting small humans.
Habitual slouching or loading weights with a loose core will teach the wrong fibers to fire. Suddenly, everyday tasks start undoing all your hard work.
How Everyday Habits Influence Strength
The way you sit, stand, and carry things rewires your floor over time. Slumping in a chair—phone in one hand, coffee in the other—short-circuits your natural tone. Lugging groceries without engaging your abs teaches your floor to buckle under pressure.
By honing your awareness of firing sequences, you transform daily chores into training moments. That makes every workout more efficient—and turns routine tasks into strength-building opportunities.
Emerging research highlights the clinical need for pelvic floor care. Pelvic floor dysfunction (PFD) affects an estimated 32% of women at some point in their lifespan worldwide, often leading to incontinence or prolapse. Learn more about these findings from this study on pelvic floor health here.
Armed with these anatomy insights and practical cues, you’re ready to dive into self-assessment techniques. Next up: discover how to pinpoint your starting point and track progress like a pro.
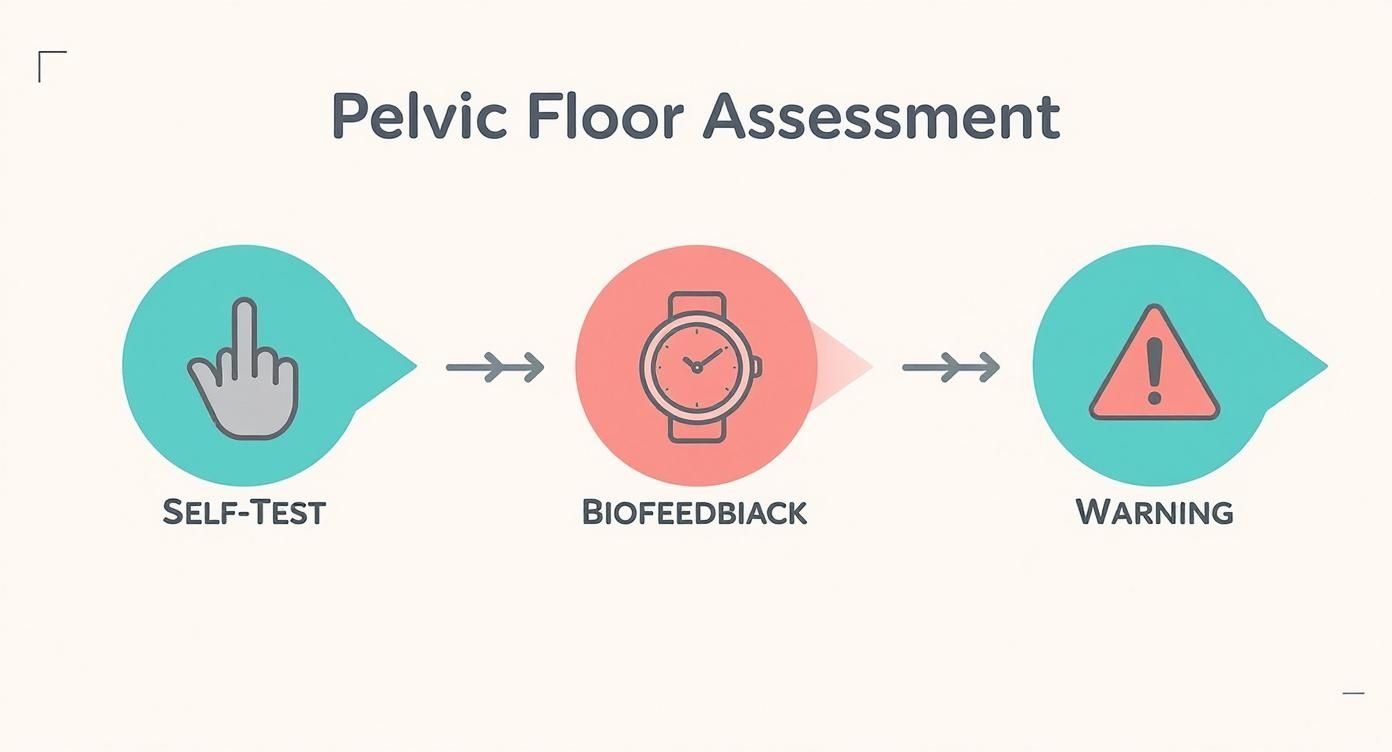
Assessing Pelvic Floor Activation And Recognizing Red Flags
Before you jump into any routine, take a moment to gauge where your pelvic floor stands right now.
I’ve seen countless clients speed through workouts only to realize they’ve never felt a true lift. Knowing your baseline saves time and prevents frustration.
A quick self-check will expose whether you’re engaging the right fibers or relying on compensations from hips, glutes, or ribs.
Here are three simple ways to sharpen your awareness:
- Contraction Holds Against Resistance measure how much force your pelvic floor sustains under load.
- Digital Palpation Cues offer direct feedback on lift, helping you sense exactly where the muscles engage.
- Wearable Biofeedback Devices track coordination, timing, and endurance in real time.
Self Test Techniques
Lie on your back with knees bent and imagine zipping gently from your tailbone toward your pubic bone.
Focus on an inward-and-upward squeeze rather than a clench—no glutes or rib expansions allowed.
One Pilates teacher I coached slipped a small ball between her inner thighs to confirm her lift direction.
That tactile cue instantly revealed she was driving the movement from her quads instead of her pelvic floor.
In another case, a client tweaked her rib position by nudging them forward just a hair.
Suddenly she felt a clean contraction she’d never experienced before.
“Adjusting my rib position unlocked a clean contraction I never felt before,” says PT Anna Lopez.
When you nail this activation, you should feel a subtle elevation without any jaw-clenching or breath-holding.
Recognizing Warning Signs
Despite growing awareness, only 22% of women practice pelvic floor exercises regularly—even though 60% report symptoms like leakage or discomfort. Read the full research on pelvic floor health in this report.
If you spot any of these cues, it’s time to pause and reassess:
- Pain During Contraction Holds often signals overactivity or strain in the muscles.
- Leakage On Sudden Load (like coughing or jumping) indicates insufficient support.
- Difficulty Relaxing suggests chronic tension or hypertonicity that needs unwinding.
| Warning Sign | What It Means | Action |
|---|---|---|
| Pain During Holds | Overactivation | Seek Guided Assessment |
| Leakage On Cough | Weakness | Return To Basic Contractions |
| Difficulty Relaxing | Excessive Tension | Incorporate Relaxation Drills |
Catching these red flags early prevents plateaus and keeps your progress steady.
Tracking Progress
Logging every session with quick notes gives you a roadmap of wins and roadblocks.
I recommend a simple chart or app where you track reps, hold times, and any quirks you notice.
Some practitioners record short video clips to compare pelvic-floor depth and rib alignment side by side.
Others prefer a bullet journal, jotting down:
- Reps And Hold Durations
- Posture Tweaks That Made A Difference
- Any Discomfort Or New Red Flags
“In eight weeks I halved my leakage events by logging holds,” shares a retired librarian.
One software engineer synced her wearable sensor data with daily notes and watched her hold durations climb from five to fifteen seconds.
A basic spreadsheet not only charts trends but also creates visual proof to share with your coach.
Pairing up with a friend or trainer adds accountability and fresh insights.
An instructor I know used video logs over six months to catch creeping compensations and correct them before they became habits.
Tracking transforms every workout into actionable data and small victories.
Next, you’ll explore structured exercises and progressions tailored to your unique assessment results.
Pelvic Floor Exercises And Progressions
Ever feel like your pelvic floor is on invisible training wheels? To build strength and confidence, start small—literally. Master those tiny lifts first before adding weight or movement.
Each phase zeroes in on the deep sling while balancing intra-abdominal pressure. We’ll move from laid-down work to standing challenges, then blend it all into a dynamic flow.
By tuning into coach cues—timing your exhale with a squeeze or mixing isometrics and pulses—you’ll speed up progress and keep motivation high.
This visual roadmap flags moments to pause, gather feedback, and spot any warning signs early. Catching issues now protects both muscle health and your confidence later on.
Basic Supine Contractions
Lie on your back with knees bent and feet flat. Picture zipping the pelvic sling upward without squeezing your glutes or thighs.
- Draw an inward, upward lift focusing on the deep sling
- Hold for 5 seconds, then rest 5 seconds; aim for 3 sets of 10 reps
- Match each exhale to your squeeze to sharpen timing
A teacher I worked with once had me place a small ball between my knees. That instant biofeedback made the correct lift impossible to miss.
Exercise Progression Comparison
Below is a straightforward comparison to help you choose the right level for your practice. Adjust as you grow stronger.
| Exercise | Level | Sets And Reps | Key Cue |
|---|---|---|---|
| Supine Contraction | Beginner | 3x10 holds (5s hold) | Feel lift without glute tension |
| Neutral Bridge With Activation | Intermediate | 3x12 bridges | Keep rib cage down, core braced |
| Standing Pelvic Floor Squeeze | Advanced | 4x8 holds (8s hold) | Visualize pressing floor upward |
| Resistance Band Pulses | Expert | 2x15 pulses (fast) | Small pulses, constant tension |
Use this table as your cheat sheet. Pick a level, nail the cues, then step up when it starts to feel too easy.
Bridges And Standing Squeezes
Next, lift into a neutral bridge while holding your pelvic floor squeeze. Keep ribs level and core engaged.
- Press through heels, lift glutes, sustain that pelvic sling
- Hold 8 seconds, lower with control; 3 sets of 12 reps
- Rest 30 seconds between sets to preserve contraction quality
Standing adds functional load. Try a mini squat or heel raise to challenge strength under gravity.
Check out our guide on Pilates Exercises for Core Strength for more core-targeted work.
Dynamic Flow And Advanced Options
When basic holds feel easy, weave movements into a flow. This raises endurance and coordination.
- Ball Squeezes: 3 sets of 12 holds, focus on inward engagement
- Resistance Band Pulses: 2 sets of 15 fast pulses at mid-hip height
- Flow Sequence: 10 reps combining bridge, squeeze, and alternating leg march
“Combining isometrics with pulses boosted my endurance within weeks,”
coach Amy Jordan shares.
For an extra challenge, pause in high plank for 5 seconds every three lifts to test dynamic control.
Troubleshooting And Pro Tips
If your hips or back protest, tweak foot placement—wider or narrower can make all the difference. Sync inhales and exhales to avoid breath-holding during squeezes. That simple habit prevents excess tension.
Pelvic floor muscle training (PFMT), first popularized by Arnold Kegel in the 1950s, shows an effectiveness rate of 29% to 59% in easing urinary incontinence. One review across nine countries found 58.8% of women with stress incontinence improved after 12 months of supervised PFMT. Learn more in this research article.
- Log your sets, reps, and hold times to spot patterns
- Scale back if you notice leaks or bulges under load
- Celebrate every small victory as you increase hold times
Consistency in small daily sessions beats sporadic intensity when strengthening your pelvic floor.
Review progress each month and tweak reps or rest as your holds lengthen. A slower descent often deepens activation without extra volume.
Partner up with a friend or coach for feedback and accountability. WundaCore’s in-person and virtual classes offer expert guidance to refine your form.
Experiment with tempo: slower squeezes build endurance, quicker pulses boost responsiveness. Adjust rest between 30 to 60 seconds—shorter breaks amp challenge, longer pauses maintain crisp form.
Now you have a clear roadmap to advance and sustain pelvic floor strength safely. Stay patient, stay consistent, and watch your pelvic health thrive day by day.
Integrating Breath And Posture With WundaCore
Learning to sync a deep diaphragmatic inhale with a precise pelvic-floor lift changes everything. That harmony not only reduces strain but also sharpens each contraction. In fact, many seasoned Pilates fans find their activation goes deeper when an exhale and squeeze meet just right.
- Diaphragmatic Breath: Inhale into the belly, then exhale into a gentle pelvic draw.
- Intra-Abdominal Pressure: Fully exhale before each lift to keep pressure balanced.
- Mind–Body Connection: Visualize your breath traveling down into the pelvic floor.
Breathing Patterns For Pelvic Support
First, sit tall on your WundaCore mat—feet grounded, spine neutral. Feel the breath expand your lower ribs and belly against the springs. Then exhale smoothly, pulling the pelvic floor inward and upward. Repeat for 5 to 8 reps, noticing the subtle shifts in feedback.
“Synchronization of breath and movement led me to feel every pelvic lift like never before.” — Amy Jordan
When you track each inhale–exhale cycle instead of racing, every rep feels richer. During dynamic flows, try a 2:3 inhale–exhale ratio to deepen control. For a real test, pause at the top of your inhale, hold core engagement for 2 counts, then release on the exhale.
Next, let’s layer in the posture that supports this breathing rhythm.
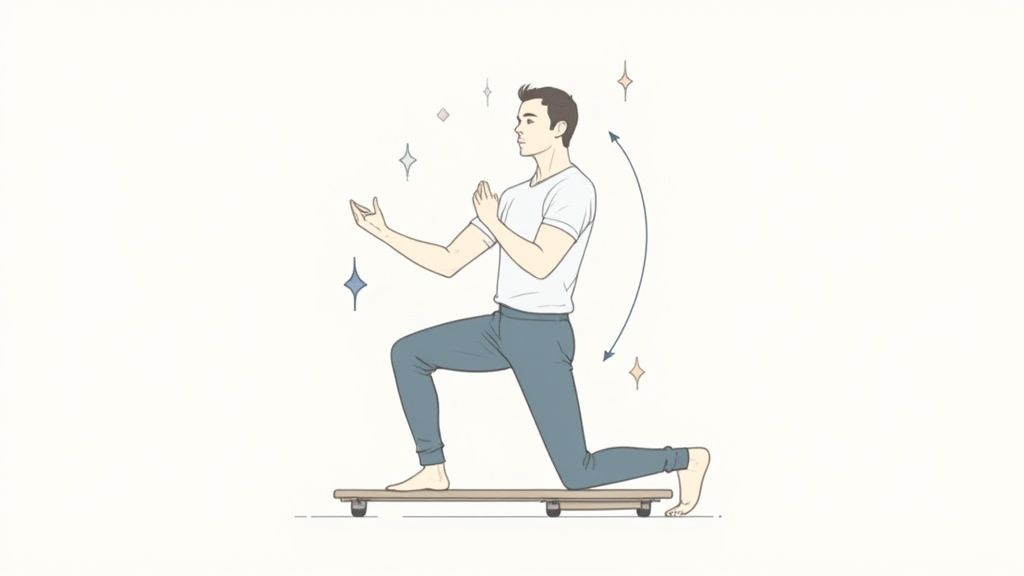
Posture Cues For Neutral Tilt
Stand hip-width on the WundaCore balance board to feel even the smallest shifts. Stack your skull over shoulders, shoulders over hips, and hips over ankles—no arch, no slump. Slip a band around your knees to cue an outward track and steadier pelvis.
- Neutral Spine: Keep your three natural curves without gripping or collapsing.
- Pelvic Tilt: Imagine balancing a bowl of water—no spills forward or back.
- Shoulder Stacks: Relax your shoulders down while engaging the core.
As you squat or rise onto your toes, sync an exhale-tuck cue. This helps you lock in neutral under load before adding complexity.
Adding Equipment Feedback
The balance board magnifies tiny tilts so you catch shifts instantly. Springs let you dial tension up or down, signaling exactly when to ease off or lean in. Bands and springs act like a built-in spotter, reinforcing safe ranges in solo sessions.
| Prop | Function | Feedback |
|---|---|---|
| Balance Board | Challenges stability | Notice subtle weight shifts |
| Resistance Bands | Adds lateral pull | Cue hip and knee control |
| Spring Attachment | Increases load during breath | Highlights timing misalignments |
Try this mini sequence at home:
- Start with 10 diaphragmatic breaths on the balance board.
- Follow with 8 spring-resistance squeezes in a seated neutral.
- Finish with 5 slow pulses using bands at hip height.
When posture drifts or breath stalls, you’ll feel it right away. If you hit a snag, a live WundaCore class can help—coaching often spots hidden habits instantly.
“A few sessions with a coach fixed habits I’d never seen in the mirror.” — Lee
Log how long you sustain each breath–squeeze cycle before fatigue sets in. To round out your toolkit, add the Original WundaCore Resistance Ring.
Supervised Vs Solo Practice
Choosing between live classes and solo sessions shapes both consistency and progress.
- Solo Sessions let you set your own pace and build independence.
- Live Classes provide real-time cues and corrections from an instructor.
- Recorded Sessions blend flexibility with expert guidance on demand.
If you struggle to keep neutral alignment or breathing patterns under load, seek out a coach’s eye. From there, hone your sensory cues to lock in every lift. Blending breath, posture, and equipment elevates pelvic-floor training—making each contraction smarter, safer, and more effective. Embrace every inhale and mindful lift for lasting strength.
Modifications For Pregnancy, Postpartum And Menopause
Adjusting pelvic-floor work to match your life stage not only sidesteps unnecessary strain but sets you up for steady gains. Pregnancy, postpartum and menopause each come with their own hormonal shifts, pressure changes and recovery timelines.
During pregnancy, the goal is to protect the growing baby while keeping your core engaged.
- Use side-lying squeezes with a pillow between your knees for extra comfort
- Perform supported wall squats with gentle pelvic lifts (3×10 holds of 5 seconds)
- Skip deep flexion or long supine holds after the first trimester to ease abdominal compression
A colleague in Berlin told me how those simple side-lying contractions kept her leak-free all the way into week 34.
Prenatal Adaptations
As your belly expands, light resistance is your friend.
Slip a loop band around your thighs at knee height and practice gentle bridge squeezes to feel that inward lift.
Rest whenever you need it and prop a bolster under your ribs to protect your spine.
Postpartum Approach
Coming back after birth means honoring tissue healing and rebuilding trust in your core.
Start on your back with heel slides—finding subtle lifts before you tackle anything more intense.
When you’re ready, move into pelvic tilts and basic Kegels (2×10 at 5-second holds).
“Starting with small movements eased my diastasis and built confidence,” says Emily, a new mom recovering from a C-section.
For anyone planning a VBAC after a C-section, it’s essential to strengthen your pelvic floor for VBAC.
You might also lean on virtual support groups or rehab programs that specialize in postpartum pelvic health.
| Phase | Key Move | Progression |
|---|---|---|
| Early Post | Heel Slides (2×10) | Add Kegels (3×10 holds) |
| Mid Post | Tilt and Lift Bridge | Introduce Loop Band (5s holds) |
| Late Post | Standing Squeeze | Combine with Mini Squats |
Menopause Considerations
Fluctuating estrogen can thin tissues and slow circulation. Low-impact sequences protect your joints, while vascular drills ease stiffness.
Try ankle pumps and seated squeezes (4×8 at 8-second holds) to get blood moving.
- Keep your sessions under 15 minutes at first to avoid overtaxing
- Cue a neutral pelvis and soft ribs to maintain alignment
- Add pelvic-floor massage or myofascial release tools twice a week
Local pelvic-health workshops offer targeted rehab strategies and handouts. You can also experiment with Virtual WundaCore sessions for real-time posture and breathing cues.
By fine-tuning routines across these three phases, you stay consistent and sidestep common setbacks. Check in regularly with your healthcare provider, celebrate your small wins and move through each stage with confidence.
FAQ
You probably have a few questions as you kick off your pelvic-floor journey. Below, you’ll discover realistic timelines for results, clever ways to weave exercises into your day, technique checks, and clear signals it’s time to get professional support.
How Long To See Results
Most people notice a subtle lift within 4 to 6 weeks when they practice at least three times per week.
By about 3 months, you’ll often observe genuine improvements in muscle endurance and some visible strengthening.
Keeping a simple log of hold durations and contraction counts makes it easy to spot progress and know when to dial up the challenge.
Fitting Exercises Into Your Day
Turn your current routines into exercise triggers. For example:
- Squeeze while you brush your teeth.
- Hold that lift as you wait for the kettle to boil.
- Slot in five-minute mini-sessions during TV commercials or short desk breaks.
You can also:
- Link contractions to meals, steps, or bathroom visits.
- Use a wearable sensor or phone reminder for quick prompts.
- Reward yourself for hitting daily goals.
Ensuring Proper Technique
How can you tell you’re doing it right? Aim for an inward-and-upward lift without gripping your glutes, abs, or thighs.
Visualize pulling a small hammock tight beneath your organs. Biofeedback devices or a gentle internal check can confirm you’re engaging the correct muscles. And remember—breathe smoothly; no breath-holding allowed.
Key Insight: Gentle pressure and steady breathing help isolate the pelvic floor and keep accessory muscles out of the picture.
When To Seek Help
Pain during contractions, ongoing leakage, or noticing a bulge are clear red flags—pause your routine and consult a specialist.
If you don’t see any improvement after 6 to 8 weeks of consistent self-care, it’s wise to seek professional guidance. Women with a history of surgery, challenging childbirth, or chronic pelvic pain often benefit most from a tailored assessment.
Ready to deepen your practice? Explore WundaCore for specialized equipment and expert-led classes to support safe, effective pelvic-floor work.