How to Strengthen Hip Abductors for Real Stability
When we talk about strengthening the hip abductors, it's easy to get lost in isolated exercises. But a truly effective approach is about building stability from the inside out, informed by how your body is anatomically designed to move. It all starts with understanding which muscles we’re targeting—specifically the gluteus medius, gluteus minimus, and tensor fasciae latae (TFL)—and training them to properly support your pelvis with every single step.
Why Your Hip Abductors Are Critical for Movement
To really get why these muscles matter, we have to look past the surface and see them for what they are: the primary frontal plane stabilizers for your entire lower body. Think of them as your body's personal support crew, working quietly behind the scenes to keep you balanced, aligned, and moving efficiently.
These muscles are located on the lateral aspect of your hip. While they’re responsible for moving your leg away from your body's midline (a movement called abduction), their most important job is actually isometric stabilization, especially when you're standing on one leg during gait.
The Key Players in Hip Stability
The hip abductor group is a small but mighty team of three primary muscles. Each one has a distinct yet collaborative role in keeping your pelvis level and your movements smooth.
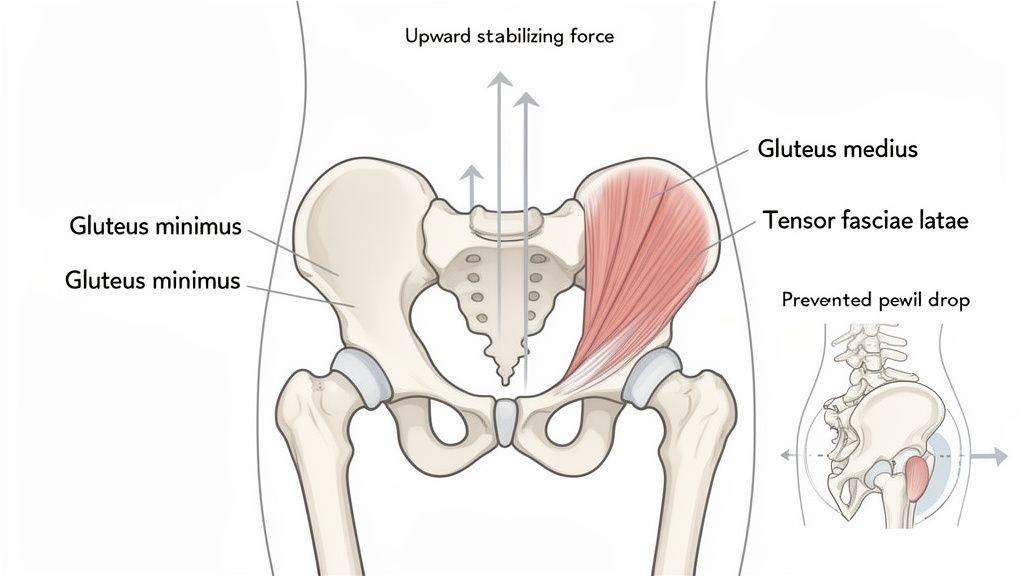
- Gluteus Medius: This is the powerhouse of the group. Originating from the outer surface of the ilium (the large, wing-like bone of the pelvis) and inserting onto the greater trochanter of the femur (the bony prominence on the side of your hip), this fan-shaped muscle is the primary pelvic stabilizer. Its fibers are oriented to powerfully prevent the opposite hip from dropping when you walk, run, or climb stairs.
- Gluteus Minimus: Tucked just beneath the gluteus medius, this is the smallest of the three gluteal muscles. It shares similar attachment points to the medius and acts as its trusty sidekick, assisting in both abduction and pelvic stabilization.
- Tensor Fasciae Latae (TFL): This muscle is located at the front and side of your hip, originating from the anterior part of the iliac crest. It inserts into the iliotibial (IT) band. While it assists in abduction, it also plays a key role in hip flexion and internal rotation, making it a multi-talented (and sometimes overworked) part of the team.
Every time you walk, run, or even just stand on one foot, these muscles contract isometrically to keep your pelvis from tilting. Picture yourself carrying groceries up a flight of stairs. With each step, the abductors on your standing leg have to fire to keep your hips level, which allows your other leg to swing through freely and safely.
When this stabilizing system is weak, the body has to find a workaround. This compensation often leads to a cascade of biomechanical issues, from a wobbly gait to chronic pain in the lower back, hips, and knees.
To make this even clearer, let's break down these key players and their roles.
Your Hip Abductor Anatomy At a Glance
Here’s a quick reference guide to the hip abductor team, their main jobs, and what you might notice when they aren't pulling their weight.
| Muscle | Primary Function | Common Sign of Weakness |
|---|---|---|
| Gluteus Medius | Main pelvic stabilizer; prevents hip drop | A visible hip drop when walking (Trendelenburg gait) |
| Gluteus Minimus | Assists in pelvic stabilization and abduction | Knee collapsing inward during squats or lunges |
| Tensor Fasciae Latae (TFL) | Assists in abduction, hip flexion, and internal rotation | Tightness or pain on the front/outside of the hip |
Seeing these anatomical connections helps clarify why strengthening this area is so much more than just an aesthetic goal—it’s foundational to healthy, efficient movement.
The Connection Between Weakness and Pain
When this neuromuscular system breaks down, other parts of your body are forced to pick up the slack. For instance, a classic sign of weak abductors is the "Trendelenburg gait," where the hip noticeably drops with each step. It might look subtle, but that biomechanical inefficiency can lead to significant problems down the line.
Nagging lower back pain is one of the most frequent complaints I hear, and it often traces back to weak abductors. The lumbar spine extensors and quadratus lumborum (QL) muscle go into overdrive trying to compensate for the lack of pelvic control.
Similarly, "runner's knee" (patellofemoral pain syndrome) frequently stems from poor hip stability, which allows the femur to adduct and internally rotate excessively during movement. This altered tracking puts a ton of undue stress on the kneecap. Understanding this anatomical chain reaction is the first real step toward building lasting strength and achieving pain-free movement for good.
How to Test Your Hip Abductor Strength at Home
Before we start adding any new exercises, we need to know where we're starting from. Think of it as a personal diagnostic—a quick check-in to understand how your hip abductors are really doing their job. These simple tests will shine a light on your unique stability patterns and give you a powerful "why" for the strengthening work we're about to do.
By assessing your starting point, you’ll be able to see and feel your progress so much more clearly. It’s also a fantastic way to sharpen your mind-muscle connection, as you’ll become more aware of how these deep stabilizers feel when they’re firing correctly.
The Single-Leg Stance Test
This first assessment is a direct challenge to your gluteus medius, which acts as the primary stabilizer for your pelvis. Its whole job is to keep your hips level when all your weight is on one foot—a move you probably make thousands of time a day without even thinking about it.
Here’s what to do:
- Stand barefoot in front of a mirror with your feet about hip-width apart.
- Place your hands on your iliac crests (the top of your hip bones) so you can physically feel any tilting or movement.
- Slowly lift one foot off the ground and find your balance on the other leg.
- Try to hold this position for 30 seconds while watching your hips in the mirror.
So, what did you see? Did the hip of your lifted leg drop down like a seesaw? Or did you have to lurch your whole torso over your standing leg just to stay upright? Both are classic signs that the abductors on your standing leg are struggling to provide the necessary counter-torque to support you. Make sure to try it on the other side, as it's very common to have one side that's stronger than the other.
The Trendelenburg Test
This is really a more dynamic version of the single-leg stance and is often used in clinical settings to spot abductor weakness. It specifically looks for what’s known as the Trendelenburg sign—that distinct hip drop we were just talking about.
A positive Trendelenburg sign isn't just some clinical jargon; it's a visual cue that your body is compensating for instability. It shows that your gluteus medius isn't strong enough to hold your pelvis neutral against the pull of gravity.
Here’s how to check for it yourself:
- Stand on one leg, just like you did in the first test.
- Now, gently bend the knee of your standing leg, almost like you're about to take a small step or do a tiny squat.
- Keep your eyes on the hip of the leg that’s in the air.
If that hip immediately sinks lower than the hip of your standing leg, it's a clear signal that the gluteus medius and minimus of your supporting leg are weak.
By doing these tests, you've just gathered some crucial intel. You now know exactly where your stability wavers, which turns the vague goal of "strengthening my hip abductors" into a clear and tangible mission.
A Progressive Program for Stronger Hip Abductors
Knowing your starting point is one thing; knowing where to go next is everything. True, lasting strength isn't built with a random collection of exercises. It comes from a deliberate, progressive plan that respects your body’s anatomy and builds intelligence into your movement.
This program is designed to guide you from foundational muscle activation all the way to integrated, functional strength. We'll move through three distinct phases, each building on the last to systematically challenge your hip abductors without overwhelming them. The real goal here is mindful control and deep muscular engagement, not just going through the motions.
Phase 1: Foundational Activation
This first phase is all about isolation and activation. We’re essentially waking up the gluteus medius and minimus, teaching them to fire on command. Think of it as re-establishing a clear line of communication between your brain and these crucial stabilizing muscles through improved neuromuscular control.
Here, momentum is your enemy. The movements should be small, slow, and intensely focused.
- Clamshells: Lie on your side, knees bent at a 90-degree angle with your heels together. Without rocking your pelvis back, lift your top knee toward the ceiling by externally rotating the hip. The magic is in the details: focus on feeling the contraction in your outer hip, specifically the posterior fibers of the gluteus medius, not your lower back.
- Glute Bridge with Abduction: Lie on your back with your knees bent and feet flat. Lift your hips into a bridge, engaging the gluteus maximus. Hold this height and slowly press your knees outward, then bring them back to the starting width with control. This isometric hold challenges the abductors while the pelvis is in a neutral position.
Perform 2-3 sets of 12-15 repetitions with a slow, deliberate tempo (2 seconds up, 1-second hold, 2 seconds down). The burn should be deep in your glutes, a sure sign you're hitting the right spot.
The secret to foundational work is precision. A perfectly executed, bodyweight clamshell is far more effective at strengthening your hip abductors than a sloppy, heavy-banded one. Quality trumps quantity every single time at this stage.
Once you can complete these with perfect form and feel a strong mind-muscle connection, you’re ready for the next layer.
This self-test gives you a great visual for what we're trying to correct—that dreaded pelvic drop is a classic sign of weak abductors.
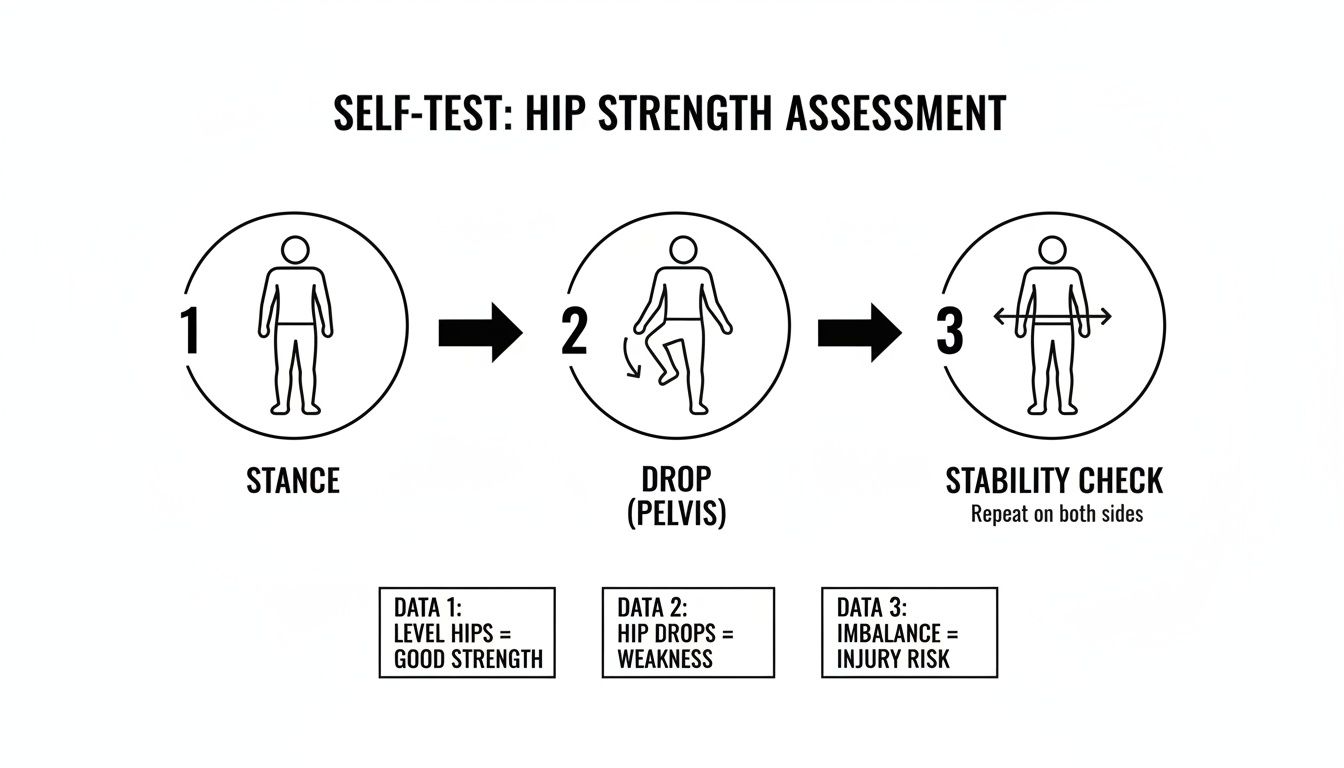
Monitoring this stability is a key indicator of your progress, and this program directly addresses it.
Phase 2: Building Endurance and Control
Now it's time to increase the demand on those muscles. We’ll challenge them through a greater range of motion and against gravity to build the muscular endurance that’s vital for stabilizing you during walking, running, or standing for long periods.
- Side-Lying Leg Lifts (Hip Abduction): Lie on your side with your legs stacked and straight. Keep your top leg in line with your torso (don't let it drift forward!) as you lift it toward the ceiling. The key is to avoid hiking your hip or rocking your torso—control the descent just as much as the lift. This isolates the gluteus medius and minimus.
- Standing Fire Hydrants: Stand next to a wall or chair for a bit of support. Keeping one knee bent at 90 degrees, lift that leg out to the side by abducting at the hip. Your torso should stay completely upright; fight the urge to lean away from the moving leg. This requires the standing leg's abductors to stabilize isometrically.
Aim for 2-3 sets of 10-12 repetitions per side. To level up, you can add a light resistance band just above your knees for the leg lifts or around your ankles for the hydrants.
The impact of this focused work is huge. A study in the Journal of Orthopaedic & Sports Physical Therapy found that women with patellofemoral pain who completed an 8-week hip abductor strengthening program saw their abduction strength jump by about 32%.
Phase 3: Integrated Functional Strength
This is where it all comes together. We move from isolated, floor-based exercises to standing movements that mimic how your body works in the real world. This phase teaches your hip abductors to fire as part of a coordinated system, stabilizing your pelvis while your body is in dynamic, weight-bearing motion.
- Banded Lateral Walks: Place a resistance band around your ankles or just above your knees. Assume a slight squat position—think athletic stance—and take controlled steps to the side, maintaining tension on the band the entire time. No waddling! This trains the abductors to work during hip flexion and extension.
- Single-Leg Romanian Deadlift (RDL): Stand on one leg and hinge at your hips, extending the other leg straight behind you for balance. Your goal is to go as low as you can while keeping your back flat and your standing-leg hip completely stable and level. This is a masterclass in pelvic stability under load.
Shoot for 2-3 sets of 8-10 repetitions per side. The focus here is less on weight and more on maintaining a perfectly level pelvis throughout the movement. These exercises don't just build raw strength; they build resilience for everyday life and athletic performance. For more ideas on building a well-rounded routine, check out these high-impact exercises from a fitness trainer.
Weaving Hip Strength Into Your Day
Knowing the right exercises is just the start. The real magic happens with consistency, but let's be honest—finding a full hour to work out can feel like a fantasy.
The secret is to stop thinking of these movements as a separate "workout" and start weaving them into the fabric of your day. This isn't about adding another chore to your to-do list; it's about making small, powerful deposits into your body's strength account. This approach helps your neuromuscular system adapt, building the kind of deep, functional strength that supports you 24/7.
Smart Routines You Can Actually Do
Life is busy. Things come up. That’s why having a few go-to mini-routines in your back pocket is a game-changer. Instead of throwing in the towel on a chaotic day, you can slot in a focused session that keeps you moving forward.
Here are three practical routines for real-life schedules:
- The 15-Minute Desk Break: This is your secret weapon against "desk body." Set a timer and do a few sets of standing fire hydrants (use your desk for a little balance) or some banded lateral walks down an empty hallway. It’s the perfect way to wake up those glutes that have gone to sleep from sitting, which can lead to a condition known as gluteal amnesia.
- Joint-Friendly Stability Session: If you’re focused on supporting bone density and joint health, this one's for you. It’s all about controlled, low-impact moves like side-lying leg lifts and clamshells. Using your WundaCore Resistance Ring here adds a layer of gentle, consistent tension that feels incredible.
- The Pre-Activity Primer: Getting ready for a run, a hike, or a weekend game? A quick, dynamic warm-up with glute bridges with abduction and some bodyweight single-leg RDLs will fire up your stabilizers. This preps them to protect your knees and back when you start moving with more intensity.
Don't underestimate how critical these abductor muscles are, especially for athletes. A huge 2023 analysis looked at 528 ACL reconstruction patients and found that hip abduction strength was a make-or-break factor for long-term success. Athletes who could abduct at least 33% of their bodyweight did much better. The shocking part? A staggering 68.9% couldn't hit that mark after rehab, showing just how common this weakness is. You can dig into the details of these findings on hip strength ratios at the International Journal of Sports Physical Therapy.
Sidestepping Common Form Mistakes
When it comes to strengthening your hip abductors, how you do the movement is everything. Rushing through reps or using sloppy form doesn't just cheat you out of the benefits—it can set you up for strain or injury. The number one mistake I see is people using momentum instead of muscle.
The goal isn't just to swing your leg up. It's to intentionally command your gluteus medius to do the lifting. That requires a slow, controlled tempo and a laser focus on the muscle you're trying to work.
Keep an eye out for these common slip-ups and use these simple cues to clean up your form instantly:
-
The Problem: Your whole torso is rocking back and forth during side-lying leg lifts. This is a classic sign that your quadratus lumborum (QL) and other spinal muscles are taking over because your abductors are checking out.
-
The Fix: Place your top hand right on your hip. Your only job is to keep that hand perfectly still as you lift your leg. If you feel it move, you’ve lifted too high. Bring it back down and try again.
-
The Problem: You’re leaning your body away from the working leg during standing exercises like fire hydrants. This shifts the effort away from the glutes you’re trying to target and compromises the stability work for the standing leg.
-
The Fix: Do the exercise standing right next to a wall, so your supporting-side hip is almost touching it. This physical boundary gives you instant feedback, preventing you from leaning and forcing your abductors to engage properly.
Bringing Your Strength Into the Real World
This is where all the hard work really starts to pay off. Moving beyond isolated exercises is when the real magic happens. The strength you’ve been building in your hip abductors isn't just for a workout; it's for life. It’s about creating a body that feels resilient, balanced, and ready for whatever your day throws at it.
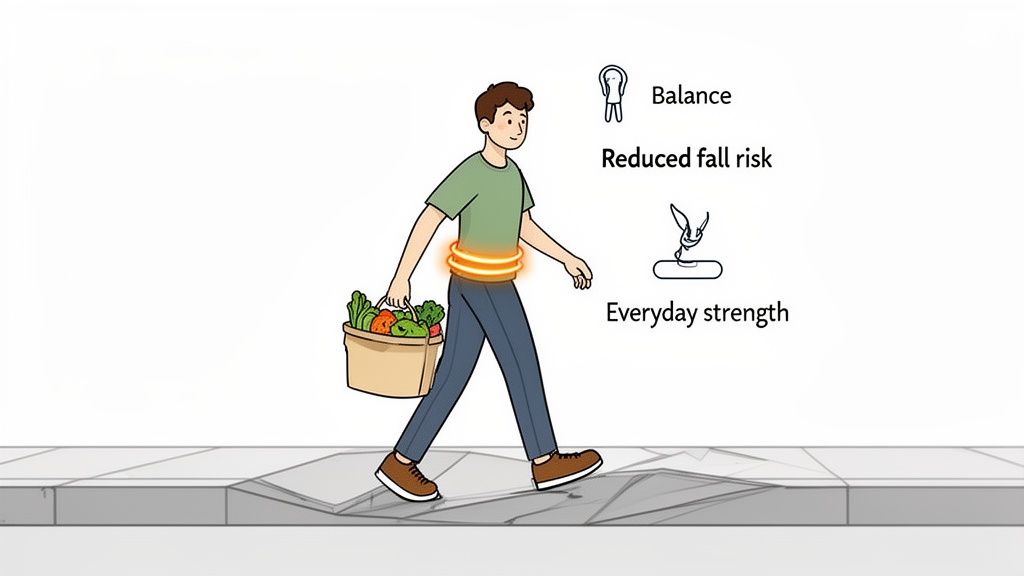
True strength is how well your body supports you through a vibrant, active life. It's the confidence you feel walking on an uneven sidewalk or the ease of carrying in all the groceries without a second thought. Every single controlled leg lift and banded walk translates directly into this real-world stability.
From the Mat to Your Everyday Movement
The exercises we've covered are designed to lay a solid foundation, but the real goal is to integrate this newfound stability into your subconscious movement. It's this process that creates lasting change, turning that intentional muscle firing into an automatic, natural response.
Think of it as an investment in your long-term mobility and independence. A strong, stable pelvis is your anchor, taking the strain off your back, knees, and ankles. This means you can stand longer without pain, play with your kids or grandkids more freely, and keep doing the things you love for years to come.
Strengthening your hip abductors is one of the most powerful things you can do to reduce your risk of falls. This isn't just about muscle; it's about building the neuromuscular control that keeps you steady on your feet.
This isn't just a theory; we've got the science to back it up. A groundbreaking 2019 clinical trial on hip fracture patients found that an intensive hip abductor strengthening program led to incredible functional improvements. The group that followed the program showed a massive 37.0% greater isometric strength in their hip abductors compared to the control group, which significantly cut their risk of future falls. You can dive into the full research on how this program boosted patient outcomes yourself.
A Commitment to Your Long-Term Wellness
Embracing this journey is about so much more than just checking off exercises on a list. It's about understanding how to build true functional strength that serves you both on and off the mat. The stability you're creating here provides a robust foundation that supports every other movement you make, from walking to lifting.
To complement your hip work and ensure you're caring for your whole body, exploring broader mobility exercises can be incredibly beneficial. For those looking to create a well-rounded routine, there are fantastic resources out there, including guides that detail essential mobility exercises for seniors which can help maintain joint health and flexibility at any age.
By connecting your mind to your muscles and your exercises to your daily life, you are creating a more intelligent, capable body. For a deeper dive, check out our guide on how to build functional strength for more strategies on making your fitness truly matter. This proactive approach to wellness is your best defense against injury and a powerful tool for maintaining your independence and quality of life.
Your Hip Abductor Training Questions, Answered
As you start to focus on strengthening your hip abductors, a few questions always seem to pop up. Let's clear up some of the common ones so you can move forward with confidence and get the most out of every movement.
How Often Should I Train My Hip Abductors?
For building that initial strength and stability, a great goal is to work on your hip abductors two to three times per week. The key is to schedule these sessions on non-consecutive days.
Remember, the real magic happens during recovery—that's when your muscles repair and get stronger. If you’re feeling particularly sore, listen to that feedback. Taking an extra rest day is always smarter than pushing through fatigue. Consistency over the long haul is what truly creates change.
Should I Use Resistance Bands or Just My Bodyweight?
When you're just starting out, bodyweight is your best friend. It’s the perfect way to really nail down your form and build that crucial mind-muscle connection. This ensures you're truly firing up the right muscles, like your glute medius, instead of letting other, bigger muscles take over.
Once you can comfortably perform 12-15 reps of an exercise with perfect control—and you can genuinely feel the target muscles doing the work—it’s time to introduce a resistance band. This is a simple and incredibly effective way to add a new challenge and keep making progress.
The golden rule here is always quality over quantity. One perfectly executed bodyweight clamshell is a thousand times more valuable than a sloppy, heavy-banded one driven by momentum.
Can I Do These Exercises If I Have Knee or Back Pain?
For many people, the answer is a resounding yes. In fact, strengthening the hip abductors is often a cornerstone of physical therapy programs for alleviating chronic knee and back issues. Why? Because stronger hips lead to a more stable pelvis, which takes a huge amount of stress off your back and knees.
The most important thing is to start slow and listen to your body. If you feel any sharp or localized pain, stop immediately. Stick with the foundational, low-impact movements like Clamshells and Glute Bridges at first. And, of course, if you have a pre-existing condition or are dealing with significant pain, it's always wise to chat with a physical therapist before jumping into a new routine.
Ready to build strength from the inside out with an anatomy-informed approach? The WundaCore collection, including our patented Resistance Ring and targeted on-demand classes, provides the perfect tools to support your journey to a stronger, more stable body. Explore the WundaCore system and start moving better today.