Advanced: advanced core exercises to unlock power
You've mastered crunches and held planks until you shake, but true core strength is more than just a six-pack. A genuinely powerful midsection is a complex, three-dimensional system of muscles working in harmony to stabilize your spine, transfer force, and control movement in every direction. This guide moves beyond the basics to deliver a definitive list of advanced core exercises designed to forge this deep, functional strength from an anatomical perspective. We're not just showing you what to do; we're explaining why it works, detailing the specific muscles you’re targeting, and providing the precise cues needed for masterful execution.
This is not a random collection of difficult movements. It's a curated blueprint for building a resilient, integrated core. You will learn to challenge your stability against rotation with exercises like the Pallof Press, control spinal flexion and extension with the Ab Wheel Rollout, and build explosive power through movements like the Bird Dog with explosive contraction. Each exercise is broken down into actionable steps, common errors to avoid, and clear progressions to ensure you're always advancing.
We’ll explore how to engage not just the rectus abdominis (the "six-pack" muscle), but also the deeper transverse abdominis, the internal and external obliques, the multifidus, and even the glutes and lats, which are crucial components of your core system. Prepare to challenge your body in new planes of motion and build a foundation of strength that translates directly into better performance, improved posture, and a significantly reduced risk of injury. Let's get to work.
1. Dead Bug with Resistance Band
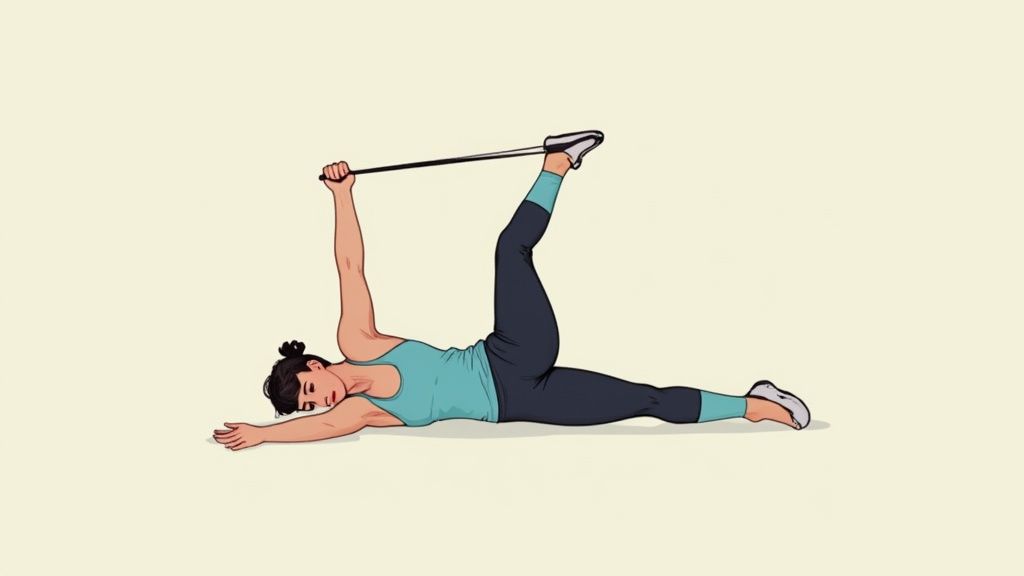
The standard Dead Bug is a foundational exercise for core stability, but adding a resistance band elevates it into one of the most effective advanced core exercises available. This variation introduces dynamic, variable resistance that forces your deep core stabilizers to work significantly harder to prevent unwanted spinal movement, particularly rotation and extension. By anchoring a band to a sturdy object and holding it in your hands, you create constant tension that your core must fight against as you extend your opposite arm and leg.
This addition transforms the exercise from a simple stability drill into a complex motor control challenge. The band’s pull constantly tries to arch your lower back and pull your torso out of alignment, demanding intense, focused engagement from your core musculature.
Anatomy in Action
The Dead Bug with Resistance Band primarily targets the deep core muscles responsible for lumbar-pelvic stability.
- Transversus Abdominis (TVA): This is your body's natural corset. The band's tension forces the TVA to contract isometrically to maintain intra-abdominal pressure and prevent your lower back from arching off the floor.
- Internal and External Obliques: These muscles work overtime to resist the rotational pull of the band, especially as your limbs extend and create a longer lever.
- Rectus Abdominis: While not the primary mover, it assists in maintaining a posterior pelvic tilt and preventing lumbar hyperextension.
- Multifidus: These small but powerful muscles along the spine are activated to stabilize each vertebra against the destabilizing forces.
How to Perform
- Setup: Anchor a light to medium resistance band to a low, stable point behind you. Lie on your back and grab the band with both hands, extending your arms straight up over your chest. Lift your legs into a tabletop position with knees bent at 90 degrees.
- Brace: Press your lower back firmly into the floor, engaging your core to create a stable base. Ensure there is tension on the band before you begin.
- Execution: Slowly extend one arm and the opposite leg toward the floor, moving in a controlled manner. Lower them as far as you can without your lower back arching.
- Hold and Return: Pause for 1-2 seconds at full extension, focusing on maintaining core tension. Slowly return to the starting position and repeat on the other side.
Pro Tips for Maximum Engagement
- Maintain Lumbar Contact: Your primary goal is to keep your lower back connected to the floor. If it starts to lift, you've gone too far or the resistance is too heavy.
- Slow, Deliberate Movement: Avoid rushing. The slower you move, the more time under tension for your core muscles.
- Exhale on Extension: Breathe out as you extend your arm and leg. This helps deepen core engagement.
- Synchronize Limbs: Ensure your opposite arm and leg move in perfect sync to maximize contralateral coordination and oblique activation.
This exercise is excellent for building true functional core strength that translates to improved posture, better athletic performance, and reduced risk of back pain. For more ideas on how to integrate bands into your routine, you can explore various exercises with resistance bands for a full-body workout.
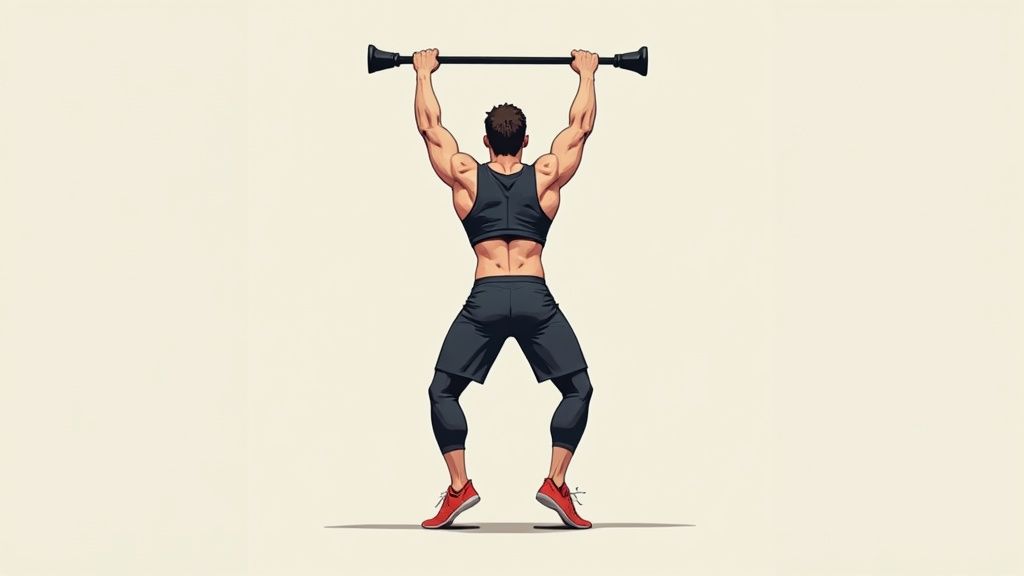
2. Pallof Press with Half-Kneeling Position
The Pallof Press is a quintessential anti-rotation movement, and performing it from a half-kneeling stance makes it one of the most effective advanced core exercises for isolating and strengthening the obliques. This variation reduces the stability provided by the lower body, forcing your core to work significantly harder to resist the rotational force from a resistance band or cable. By pressing the weight away from your chest, you lengthen the lever arm, dramatically increasing the challenge to your transverse plane stability.
This exercise directly trains your core’s ability to prevent unwanted twisting through the torso, a crucial function for athletic power and preventing spinal injuries. The half-kneeling position also exposes and corrects imbalances between the left and right sides of your core, promoting symmetrical strength and stability.
Anatomy in Action
The Half-Kneeling Pallof Press is a masterclass in isometric core engagement, primarily targeting the muscles that prevent trunk rotation.
- Internal and External Obliques: These are the primary targets. The obliques on the side furthest from the anchor point must contract powerfully to prevent your torso from being pulled into rotation. The obliques on the closer side assist in this stabilization.
- Transversus Abdominis (TVA): This deep core muscle activates to maintain intra-abdominal pressure, stiffening the entire midsection and providing a stable base for the spine.
- Gluteus Medius and Maximus: In the half-kneeling stance, the glute of the down-leg works isometrically to stabilize the pelvis and prevent it from shifting or rotating.
- Rectus Abdominis: Assists in preventing spinal extension and helps maintain a neutral ribcage position over the pelvis.
How to Perform
- Setup: Anchor a resistance band or set a cable pulley at chest height. Kneel perpendicular to the anchor point in a half-kneeling position, with your inside knee down and your outside foot forward. Your knees and hips should be at 90-degree angles.
- Brace: Hold the handle with both hands at the center of your chest. Engage your core and glutes, ensuring your shoulders and hips are square and facing forward.
- Execution: Slowly press your hands straight out in front of your chest until your arms are fully extended. Fight the urge to let the band pull you into rotation.
- Hold and Return: Pause for 2-3 seconds at full extension, focusing on maintaining total body tension. Slowly bring your hands back to your chest with control. Complete all reps on one side before switching.
Pro Tips for Maximum Engagement
- Stay Square: Your primary focus is to keep your shoulders and pelvis perfectly aligned and facing forward. Do not allow any twisting.
- Pelvic Stability: Squeeze the glute of your rear leg to keep your pelvis stable and prevent your lower back from arching.
- Exhale on the Press: Breathe out forcefully as you extend your arms. This will help you create more tension through your TVA and obliques.
- Control the Negative: The return journey is just as important as the press. Resist the pull of the band as you bring your hands back to your chest slowly and with control.
This exercise is a staple for athletes in rotational sports like baseball and golf but is invaluable for anyone looking to build a truly resilient and functional core that resists injurious forces.
3. Ab Wheel Rollout with Single-Arm Variation
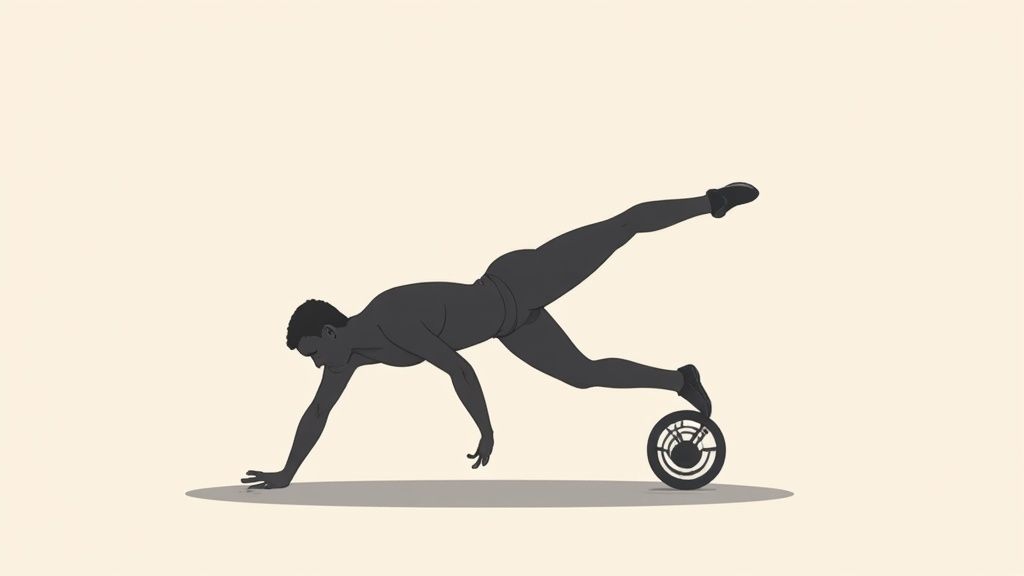
The standard Ab Wheel Rollout is a gold-standard anti-extension exercise, but the Single-Arm Variation transforms it into one of the most demanding advanced core exercises imaginable. By removing one point of contact, you introduce massive asymmetrical loading that challenges your core to resist lateral flexion and rotation simultaneously. This unilateral stress forces your oblique sling system and deep stabilizers to fire with incredible intensity to keep your torso and pelvis from collapsing to one side.
This variation is not just about making the exercise harder; it’s a masterclass in total body tension and control. The immense destabilizing force requires absolute concentration and core engagement from the moment you initiate the movement until you return to the start, making it a favorite in gymnastics conditioning and among elite athletes.
Anatomy in Action
This exercise creates an all-out assault on your entire anterior and lateral core, demanding stability across multiple planes of motion.
- Internal and External Obliques: These are the primary targets. The obliques on the non-working side must contract powerfully to prevent your torso from bending sideways (lateral flexion) and twisting toward the floor.
- Quadratus Lumborum (QL): This deep lower back muscle on the non-working side works in concert with the obliques to prevent the pelvis from dropping, providing crucial lateral stability.
- Transversus Abdominis (TVA): Your deep core corset works at maximum capacity to maintain intra-abdominal pressure and prevent your spine from hyperextending as you roll out.
- Rectus Abdominis: The "six-pack" muscle works isometrically to resist spinal extension, but the rotational and lateral forces place a much greater demand on the obliques.
- Latissimus Dorsi: Your lats are heavily engaged on the working side to control the wheel and pull your body back to the starting position.
How to Perform
- Setup: Start in a kneeling or standing position (highly advanced) with an ab wheel in one hand, positioned directly under your shoulder. Extend your non-working arm out to the side or overhead for balance.
- Brace: Engage your core by tucking your tailbone slightly and bracing as if you're about to take a punch. Squeeze your glutes to stabilize your pelvis.
- Execution: Slowly and with extreme control, roll the wheel forward, extending your body into a near-horizontal position. Fight the urge to let your hip on the non-working side drop or your torso twist.
- Hold and Return: Pause briefly at your maximum controlled extension. Use your lats and core to powerfully pull the wheel back to the starting position without breaking form. Complete all reps on one side before switching.
Pro Tips for Maximum Engagement
- Start with Knees: Master the kneeling version before ever attempting the standing variation. The forces involved are extreme.
- Control the Eccentric: The rollout phase is the most challenging. Move slowly to maintain tension and prevent your form from breaking down.
- Fight Rotation: Your primary focus should be on keeping your shoulders and hips perfectly square to the floor throughout the entire movement.
- Limit Range of Motion: Initially, only roll out as far as you can while maintaining perfect form. Gradually increase the distance as your strength improves.
This exercise builds unparalleled anti-rotation and anti-lateral flexion strength, which is essential for rotational sports, injury prevention, and developing a truly resilient core.
4. Stir the Pot (Swiss Ball)
Popularized by spine biomechanics expert Dr. Stuart McGill, "Stir the Pot" is a deceptively challenging exercise that takes the standard plank to an entirely new level. It's one of the most effective advanced core exercises for building a truly resilient midsection by combining instability with dynamic movement. The exercise involves holding a plank on a Swiss ball and making small, controlled circles with your forearms, as if stirring a large pot.
This simple-sounding movement creates immense rotational and anti-extension forces that your core must fight to stabilize. The unstable surface of the ball demands constant micro-adjustments from your deep core muscles, building endurance and rock-solid stability that protects the spine under load.
Anatomy in Action
Stir the Pot is a comprehensive core exercise that recruits nearly every muscle in your midsection to maintain a rigid, neutral torso.
- Rectus Abdominis: This muscle works isometrically at a high intensity to prevent the lower back from sagging (lumbar extension) as you circle your arms away from your body.
- Transversus Abdominis (TVA): The TVA acts as a natural weightlifting belt, cinching tight to create intra-abdominal pressure and provide segmental stability to the spine. The instability of the ball forces it into overdrive.
- Internal and External Obliques: These are the primary anti-rotation muscles. As your arms move in circles, the obliques on both sides fire continuously to prevent your hips and torso from twisting.
- Latissimus Dorsi and Serratus Anterior: These back and shoulder muscles are heavily engaged to "lock" your shoulder blades to your ribcage, creating a stable platform from which your arms can move.
How to Perform
- Setup: Kneel in front of a Swiss ball and place your forearms on top of it, clasping your hands together. Extend your legs back one at a time into a solid plank position, ensuring your body forms a straight line from head to heels.
- Brace: Squeeze your glutes and brace your core as if preparing for a punch. Keep your shoulders pulled down and away from your ears.
- Execution: Initiate the movement from your shoulders, slowly "stirring" your forearms in a small, controlled circle on the ball. Keep the rest of your body absolutely still.
- Reverse and Repeat: Complete the prescribed number of circles in one direction (e.g., 5-10 clockwise), then reverse and perform the same number of circles in the other direction (counterclockwise).
Pro Tips for Maximum Engagement
- Start Small: Begin with very small circles, about the size of a dinner plate. Focus on perfect stability before increasing the diameter of your circles.
- Maintain a Rigid Plank: Do not allow your hips to sag, pike, or rotate. The goal is to isolate the movement to your arms while the core remains completely locked in.
- Control the Pace: Perform the circles slowly and deliberately. Rushing the movement uses momentum and defeats the purpose of the exercise.
- Equal Work: Always perform the same number of repetitions in both the clockwise and counterclockwise directions to ensure balanced muscular development.
This exercise is a staple in high-level athletic training and rehabilitation for its ability to build functional, protective core strength. Its principles of stability and control are central to many Pilates exercises for core strength, making it a perfect addition to any advanced routine.
5. Landmine Rotational Press (Single-Leg)
The Landmine Rotational Press is a dynamic power exercise that blends core rotation, anti-rotation stability, and single-leg balance into one highly effective movement. By performing a press in a single-leg stance, you create an unstable environment that forces your core to work overtime to transfer force from the ground up through your torso and into the barbell. This makes it one of the most functional advanced core exercises for developing integrated, full-body strength.
This exercise challenges your core's ability to both generate and resist rotational forces simultaneously. As you press the barbell away from your body, your core must stabilize your hips and spine against the shifting load, demanding intense engagement from your deep stabilizing muscles and improving proprioception. It's a staple in conditioning programs for combat sports athletes and rotational sport players for this very reason.
Anatomy in Action
This compound movement recruits a complex network of muscles, with the core acting as the critical link between the lower and upper body.
- Internal and External Obliques: These are the prime movers for generating rotational power. They work in a contralateral fashion (e.g., left external oblique with right internal oblique) to twist the torso and drive the barbell upward and forward.
- Transversus Abdominis (TVA): The TVA contracts forcefully to maintain intra-abdominal pressure, stabilizing the lumbar spine and preventing excessive arching or twisting, which is crucial during the single-leg stance.
- Quadratus Lumborum (QL): This deep lower back muscle is heavily engaged to stabilize the pelvis and prevent the hip of the non-standing leg from dropping, a key component of single-leg stability.
- Gluteus Medius: On the standing leg, this muscle works tirelessly to maintain hip stability and prevent the knee from caving inward (valgus collapse).
How to Perform
- Setup: Place one end of a barbell into a landmine attachment or securely in a corner. Stand on one leg, holding the free end of the barbell with both hands at chest height. The standing leg should be the one opposite the pressing side.
- Brace: Engage your core, keep your chest up, and maintain a slight bend in your standing knee. Ensure your hips and shoulders are square to start.
- Execution: Initiate the movement by pivoting from your hips and rotating through your torso. Explosively press the barbell up and away from your body until your arm is fully extended. Follow the bar with your eyes.
- Control and Return: In a controlled manner, reverse the motion, bringing the barbell back to the starting position at your chest. Reset your balance and repeat for the desired number of reps before switching sides.
Pro Tips for Maximum Engagement
- Initiate from the Core: Drive the movement from your hips and obliques, not just your arms and shoulders. The press should be the final part of a powerful rotational sequence.
- Keep Hips Level: Focus on preventing your hips from tilting or dropping as you rotate. This maximizes the anti-rotation demand on your core.
- Start with Two Feet: Master the double-leg stance variation first to learn the rotational pattern before adding the instability of a single-leg base.
- Maintain Upright Posture: Resist the urge to lean away from the weight. Staying tall forces your core to work harder to stabilize your spine.
This exercise is a superior tool for building power that translates directly to athletic movements and real-world activities. To understand more about how such integrated movements contribute to real-world capability, explore these principles on how to build functional strength and improve your overall performance.
6. Weighted Dragon Flag with Decline Bench
Popularized by martial arts legend Bruce Lee, the Dragon Flag is an iconic display of total-body tension and core strength. Performing it with added weight on a decline bench elevates the movement into one of the most demanding advanced core exercises imaginable. This variation combines an unstable decline angle with external load, creating an unparalleled eccentric challenge that builds exceptional core power and control.
By positioning your body on a decline, you increase the range of motion and the gravitational pull on your lower body. Adding a weight plate across your chest further intensifies this load, forcing every muscle from your upper back to your toes to fire in unison to maintain a rigid, straight line. This is a true test of maximal core strength, particularly during the slow, controlled lowering phase.
Anatomy in Action
The Weighted Dragon Flag on a decline bench is a full-body exercise with an intense focus on the entire anterior core chain and hip flexors.
- Rectus Abdominis: This muscle is under extreme eccentric load as you lower your body. It works to prevent spinal hyperextension, fighting gravity with every inch of the descent.
- Transversus Abdominis (TVA) and Obliques: The TVA and obliques must create immense intra-abdominal pressure and bracing to stabilize the lumbar spine and prevent any lateral or rotational movement. The added weight makes this stabilization role significantly more difficult.
- Hip Flexors (Iliopsoas): These muscles work powerfully to help control the descent of the legs and maintain the connection between the pelvis and the torso.
- Latissimus Dorsi: Your lats are heavily engaged as you grip the bench behind your head, creating a stable anchor point and contributing to overall upper body tension.
How to Perform
- Setup: Lie on a decline bench, securing your feet at the top. Reach back and firmly grip the edges of the bench or the support pads behind your head. Place a light weight plate (5-10 lbs) on your chest and hold it securely with both hands.
- Brace: Contract your glutes and brace your entire core, driving your upper back into the bench.
- Execution: Pull your knees toward your chest and then extend your legs up, creating a straight line from your shoulders to your feet, supported only by your upper back. Your body should be nearly vertical.
- Descent and Return: In a highly controlled motion, slowly lower your entire body as one rigid unit. Aim for a 3-5 second eccentric phase. Lower until your body is parallel to the bench, then powerfully pull yourself back to the starting position.
Pro Tips for Maximum Engagement
- Master Bodyweight First: Before even attempting this version, you must be able to perform at least 5 perfect bodyweight Dragon Flags on a flat surface.
- Control the Eccentric: The most important part of this exercise is the slow, controlled descent. If you cannot lower your body slowly, the weight is too heavy.
- Maintain a Rigid Line: Do not allow your hips to sag or your back to arch. Squeeze your glutes and abs to keep your body as straight as a plank throughout the movement.
- Adequate Recovery: This is an extremely taxing exercise on your central nervous system and muscles. Allow a minimum of 48-72 hours of recovery between sessions.
7. Hanging Leg Raise with Weighted Vest and Holds
The standard hanging leg raise is a classic test of core and grip strength, but adding a weighted vest and an isometric hold catapults it into the elite tier of advanced core exercises. This progression introduces significant external load and time under tension, forcing your abdominals and hip flexors to generate immense force to overcome gravity. The pause at the peak of the movement removes all momentum and creates an incredible isometric challenge.
This variation transforms the exercise from a dynamic movement into a multifaceted test of concentric, isometric, and eccentric strength. The weighted vest increases the demand on the entire kinetic chain, from your grip and lats stabilizing your body to the core musculature performing the lift and hold. This is a true measure of raw, functional core power, popularized in gymnastics and military fitness protocols for its effectiveness.
Anatomy in Action
This loaded movement heavily recruits the muscles responsible for powerful hip and spinal flexion, while also demanding serious stabilization from the upper body.
- Rectus Abdominis: As the primary spinal flexor, this muscle contracts powerfully to curl the pelvis toward the ribcage, lifting the weighted legs. It works isometrically during the hold to prevent extension.
- Hip Flexors (Iliopsoas and Rectus Femoris): These are the prime movers for lifting the legs. The added weight from the vest places a significant concentric and isometric demand on this muscle group.
- External and Internal Obliques: The obliques engage strongly to stabilize the pelvis, prevent lateral swinging, and assist the rectus abdominis in posterior pelvic tilt.
- Latissimus Dorsi and Scapular Stabilizers: Your lats, traps, and rhomboids must remain active to keep your shoulders depressed and packed, creating a stable base from which your core can work.
How to Perform
- Setup: Put on a weighted vest and grasp a pull-up bar with an overhand, shoulder-width grip. Hang with your arms fully extended and your body in a straight line.
- Brace: Engage your lats by pulling your shoulder blades down and back. Create tension in your core by initiating a slight posterior pelvic tilt.
- Execution: Keeping your legs relatively straight (a slight knee bend is acceptable), use your core and hip flexors to raise your legs until your feet are at or above bar height.
- Hold and Return: Pause at the top for a 1-2 second count, squeezing your abs intensely. Slowly lower your legs with control, taking at least 2-3 seconds for the descent.
Pro Tips for Maximum Engagement
- Master the Basics First: Do not attempt this with a vest until you can perform at least 10-12 strict, unweighted hanging leg raises with perfect form.
- Control the Negative: The eccentric (lowering) phase is crucial. Fighting gravity on the way down builds significant strength and control.
- Maintain Pelvic Tilt: Actively tuck your pelvis under throughout the movement. This keeps the focus on the abs and protects your lower back from hyperextension.
- Engage Your Shoulders: Keep your shoulders active and away from your ears. A passive "dead hang" can strain the shoulder joints and reduce stability.
8. Bird Dog with Explosive Contraction and Pulse
The standard Bird Dog is a staple for developing baseline core stability, but this variation introduces dynamic, multi-phase muscle contractions that make it one of the most challenging advanced core exercises. By adding explosive pulses and intense isometric holds, you transform a simple stability drill into a potent tool for building neuromuscular control and deep core endurance. This version forces your core to manage rapid force changes and then sustain maximal tension, hitting your stabilizing muscles in a way static holds cannot.
This combination of movement patterns creates a unique stimulus. The explosive pulses challenge the reactive strength of your core, while the concluding isometric hold pushes your muscular endurance and focus. This trains your core to both react quickly and brace powerfully, a crucial combination for athletic performance and injury prevention.
Anatomy in Action
The Bird Dog with Explosive Contraction and Pulse challenges the entire posterior and anterior core system, demanding synchronization and stability.
- Multifidus and Erector Spinae: These deep back muscles work isometrically to maintain a neutral, rigid spine, preventing any arching or rounding, especially during the explosive pulses.
- Transversus Abdominis (TVA): Your deep abdominal "corset" must stay intensely braced to prevent lumbar movement and maintain intra-abdominal pressure. The pulsing action specifically challenges the TVA's ability to maintain constant tension.
- Gluteus Maximus and Medius: The glutes of the extended leg fire powerfully to create hip extension and resist pelvic rotation, which is particularly difficult to control during the pulses.
- Internal and External Obliques: The obliques act as an anti-rotation system, working overtime to keep your torso and hips square to the floor as the limbs move and pulse.
How to Perform
- Setup: Start on all fours in a tabletop position, with your hands directly under your shoulders and your knees directly under your hips. Engage your core to create a flat, neutral back.
- Brace: Before moving, brace your core as if preparing for a punch. Imagine a straight line from the crown of your head to your tailbone.
- Execution: Slowly extend one arm straight forward and the opposite leg straight back, keeping them parallel to the floor. At the end range of motion, perform 10-15 small, controlled, explosive pulses, moving your hand and foot up and down by only an inch or two.
- Hold and Return: After the final pulse, hold the extended position with maximum contraction intensity for 5-10 seconds. Focus on keeping your entire body rigid. Slowly return to the starting position with control and repeat on the other side.
Pro Tips for Maximum Engagement
- Spinal Alignment is Key: Your torso should remain perfectly still throughout all phases. Avoid any rocking, dipping, or arching. If you lose form, reduce the number of pulses.
- Focus on the Core, Not the Limbs: The goal is core stabilization, not how high you can lift your arm or leg. The limb movement is just a tool to challenge your trunk.
- Master the Static Hold First: Before adding pulses, ensure you can hold a standard Bird Dog with perfect form for at least 30-45 seconds.
- Breathe Steadily: Do not hold your breath. Maintain a steady, controlled breathing pattern throughout the exercise to help keep your core engaged.
8 Advanced Core Exercises Comparison
| Exercise | 🔄 Implementation Complexity | ⚡ Resource Requirements | ⭐ Expected Effectiveness | 📊 Expected Outcomes | 💡 Ideal Use Cases / Key Advantage |
|---|---|---|---|---|---|
| Dead Bug with Resistance Band | Moderate — requires band setup and coordination | Low — resistance band & anchor | ⭐⭐⭐⭐ | Improved deep core stability and contralateral coordination | 💡 Rehab & general athletic stability; press lower back, start light |
| Pallof Press (Half‑Kneeling) | Moderate–High — positioning and coaching needed | Moderate — cable or stable band setup | ⭐⭐⭐⭐ | Enhanced anti‑rotation control and transverse stability | 💡 Rotational athletes; focus on resisting torso rotation, progress load not ROM |
| Ab Wheel Rollout (Single‑Arm) | Very High — advanced unilateral control and eccentric demand | Low — ab wheel only | ⭐⭐⭐⭐⭐ | Extreme core activation; reveals left‑right imbalances | 💡 Advanced athletes; build unilateral strength and half‑range first |
| Stir the Pot (Swiss Ball) | Moderate — requires body awareness on unstable surface | Low — Swiss ball (correct size) | ⭐⭐⭐⭐ | Continuous deep core activation and proprioceptive gains | 💡 Rehab and stability work; start with small circles, prioritize form |
| Landmine Rotational Press (Single‑Leg) | High — complex coordination, balance and technique | Moderate — landmine setup or barbell pivot | ⭐⭐⭐⭐ | Develops rotational power with unilateral balance training | 💡 Sport power transfer; initiate from core rotation, progress stance |
| Weighted Dragon Flag (Decline Bench) | Very High — extreme eccentric control and risk | Moderate — decline bench + weight | ⭐⭐⭐⭐⭐ | Maximal eccentric core strength and hip‑flexor demand | 💡 Elite only; master bodyweight version, progress very slowly |
| Hanging Leg Raise (Weighted Vest & Holds) | High — requires grip, shoulder and core control | Moderate — pull‑up bar + weighted vest | ⭐⭐⭐⭐ | Strong lower‑ab strength, isometric endurance and grip gains | 💡 Progress with small vest increments; maintain posterior pelvic tilt |
| Bird Dog w/ Explosive Pulse | Moderate — timing and control required | Minimal — bodyweight only | ⭐⭐⭐⭐ | Improved neuromuscular control, endurance and dynamic stability | 💡 Accessible rehab option; master static bird dog before pulsing |
Integrating Advanced Core Training into Your Routine
You have now explored a powerful arsenal of advanced core exercises, moving far beyond the standard crunch to build a truly resilient, functional, and deeply integrated core. This journey wasn't just about learning new movements; it was about understanding the "why" behind them. From the anti-rotation demands of the Pallof Press to the anti-extension challenge of the Ab Wheel Rollout, each exercise targets the core musculature in a specific, three-dimensional way.
The key takeaway is that an advanced core isn't just about aesthetics; it's about performance, stability, and injury prevention. A strong core is the nexus of all athletic movement, the critical link in the kinetic chain that transfers force between your upper and lower body. By mastering these exercises, you are training your body to function as a cohesive, powerful unit.
From Knowledge to Action: Your Next Steps
Transitioning from reading to doing is the most critical step. Instead of randomly trying these exercises, a structured approach will yield the best results and keep you safe.
- Master the Foundations First: Before attempting a Weighted Dragon Flag, ensure your basic Hollow Body Hold is impeccable. If you cannot maintain a neutral spine during a standard Bird Dog, the explosive variation will only reinforce poor mechanics. Always earn your progression.
- Prioritize Form Over Load: Adding weight or complexity to a faulty movement pattern is a recipe for injury. Film yourself or use a mirror to check your form. Pay close attention to the common errors we discussed for each exercise, such as lumbar hyperextension or hip dropping.
- Integrate, Don't Isolate: Weave 1-2 of these advanced core exercises into your existing routine 2-3 times per week. You can place them at the beginning of your workout to prime your central nervous system or at the end as a dedicated finisher. The sample mini-workouts provided earlier offer a great starting point for structured integration.
The Anatomy-Informed Approach to Core Strength
Remember, the "core" is not just the rectus abdominis. It’s a complex system of muscles working in harmony.
Key Insight: True core strength is defined by your ability to resist unwanted motion. It’s about maintaining spinal stability against external forces, whether you're lifting a heavy object, swinging a golf club, or simply maintaining posture.
Exercises like the Landmine Rotational Press and Stir the Pot are so effective because they challenge your deep core stabilizers, including the transverse abdominis and the internal and external obliques, to fire in a coordinated sequence. This is the essence of functional training. By focusing on the anatomical purpose of these muscles, you move from simply "working your abs" to building a sophisticated system of support and power.
For fitness professionals aiming to bring this level of detail to their clients, understanding how to cue these complex movements is paramount. For those looking to elevate their teaching skills, exploring advanced group fitness instruction techniques can provide the tools to effectively communicate nuanced anatomical concepts and ensure participant safety.
Ultimately, embracing these advanced core exercises is a commitment to a higher level of fitness intelligence. It's about respecting your body’s intricate design and training it with the precision it deserves. This path requires patience, attention to detail, and a consistent effort, but the rewards are profound: a stronger, more capable body ready to take on any challenge.
Ready to unlock a new level of core activation and control with a tool designed for precisely this purpose? WundaCore provides the dynamic resistance and ergonomic support needed to progress your core work safely and effectively, making studio-quality Pilates accessible at home. Explore the WundaCore today and feel the difference that intelligent, anatomy-focused training can make.