How to Correct Muscle Imbalances: An Anatomical Guide to Self-Assessment and Corrective Exercises
Correcting muscle imbalances isn't just about hammering away at weak spots. If you've ever felt like you're spinning your wheels—stretching your hamstrings only to have them feel tight again the next day—it's likely because the sequence is off. We need an anatomical roadmap, a clear plan that communicates with your neuromuscular system in the right order.
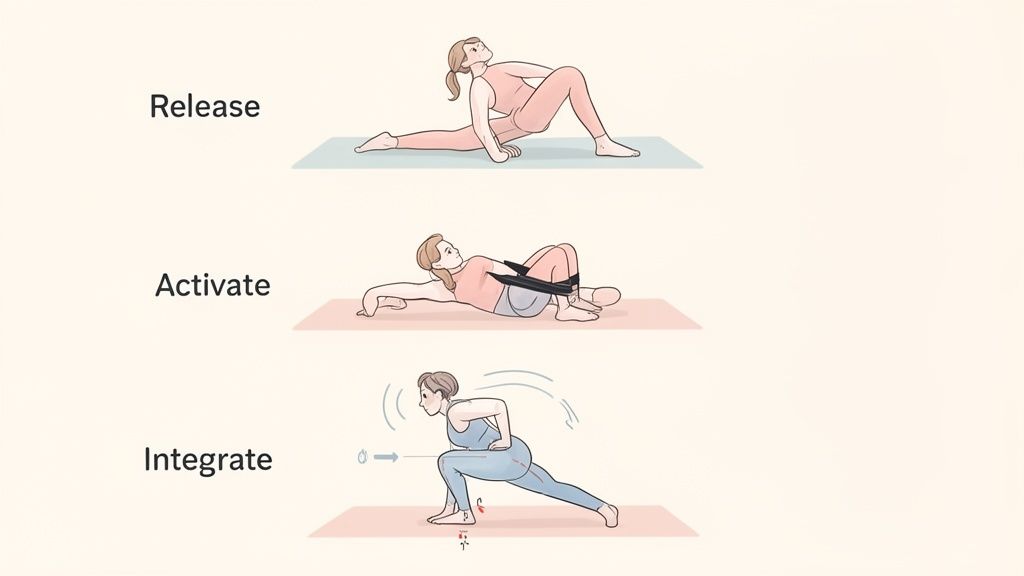
It all comes down to a simple, three-phase flow: release the overactive muscles, activate the underused ones, and then integrate them back into full-body movements.
Your Quick Guide to Correcting Muscle Imbalances
Before jumping into a workout, let's understand the anatomical why behind this specific order. Trying to strengthen a weak muscle while its opposing muscle is still tight and overactive is like trying to drive with the parking brake engaged. You might move, but it’s inefficient, and your body will default to its old, familiar compensation patterns.
Think of your muscles as working in partnerships around a joint. The muscle that contracts to create movement is the agonist, while the muscle on the opposite side that must lengthen is the antagonist. An imbalance occurs when the agonist becomes chronically tight (hypertonic) and dominant. This neurologically inhibits the antagonist, forcing it into a lengthened, weakened state.
Our goal is to restore that agonist-antagonist partnership.
The Three Pillars of Correction
By following this precise sequence, we’re not just exercising; we're re-educating the entire neuromuscular system. We're teaching your body how to find and use a more efficient, symmetrical path of movement.
-
Mobility and Release: First, we need to down-regulate the nervous system's input to the "bullies"—those hypertonic, overworked muscles dominating the movement. This is where tools like foam rollers or targeted stretching come in. For example, by releasing chronically tight hip flexors (psoas and rectus femoris), you create the mechanical space and neurological permission for the gluteus maximus to finally do its job.
-
Activation: Once the dominant muscles have been quieted, it’s time to wake up their sleepy partners. This phase is all about precision. We use low-load exercises to build a strong mind-muscle connection. Resistance bands are perfect here; they provide just enough gentle feedback to help you feel the target muscle firing, sometimes for the first time in a long while.
-
Integration: With all the relevant muscles awake and ready to work, we can now put it all together. The final step is to integrate these newly activated muscles into larger, compound movements. This is where you teach the entire kinetic chain to work as a coordinated team, solidifying the new, more balanced motor pattern so it becomes second nature.
This corrective framework is central to how we approach movement in Pilates. We systematically peel back the layers of compensation to rebuild a stronger, more intelligent foundation from the ground up.
Let's break this down into a simple table.
The Three Phases of Corrective Pilates
| Phase | Anatomical Goal | Example Movement | Recommended Prop |
|---|---|---|---|
| Mobility | Inhibit overactive muscles | Foam Rolling Quads | Foam Roller |
| Activation | Engage underactive muscles | Glute Bridge with Band | Resistance Band |
| Integration | Coordinate new motor patterns | Bodyweight Squat | WundaCore Ring |
As you can see, each phase builds logically on the last. You can't just skip to the end; the magic is in the process.
By prioritizing this release-activate-integrate sequence, you move beyond just chasing symptoms. You’re addressing the root anatomical cause of the imbalance, creating lasting change that supports better posture, improved performance, and overall well-being. This is the core principle that makes Pilates-informed corrective exercise so effective.
Understanding Why Muscle Imbalances Happen
Before we can jump into fixing muscle imbalances, we have to get to the root of why they happen in the first place. These asymmetries rarely pop up out of nowhere. They're almost always a direct result of our daily lives—our repetitive habits creating predictable patterns of tightness and weakness throughout the body.
Think about the classic "desk slump" over a laptop. This posture, held for hours a day, chronically shortens the pectoral muscles (pectoralis major and minor) in your chest. At the same time, it lengthens and weakens the rhomboids and mid-trapezius muscles in your upper back. Over time, your body just adapts, creating a muscular tug-of-war that pulls your shoulders forward and yanks your head out of alignment.
Common Anatomical Patterns
This dynamic of tight-versus-weak muscles is a theme I see again and again. For instance, a new parent who always carries their child on the right hip can easily develop a lateral pelvic tilt. Anatomically, this tightens up the right quadratus lumborum (a deep low-back muscle) and overworks the right hip abductors (gluteus medius). Meanwhile, the muscles on the left side become stretched out and less engaged.
We see this constantly in athletes, too. A right-handed tennis player builds incredibly powerful rotational muscles (obliques, serratus anterior) on one side of their torso but often neglects the other. This can lead to imbalances that ripple out, affecting the spine and hips. These are all textbook examples of reciprocal inhibition, where a tight, overactive muscle (the agonist) actually sends a neurological signal that weakens its opposing muscle (the antagonist).
These common patterns are often bundled into what we call "syndromes." That desk posture I mentioned? It’s a classic example of Upper-Crossed Syndrome, where tight chest and neck muscles are paired with weak upper-back and deep neck flexors. When you start to see the body as this interconnected system, it all starts to make sense.
Hypertonic vs. Inhibited Muscles
To actually correct the issue, you need to know which muscles are hypertonic (chronically tight and overactive) and which are inhibited (lengthened, under-active, or "switched off"). Hypertonic muscles need to be released and lengthened. The inhibited muscles? They need to be woken up. You can learn more about this re-awakening process by exploring what muscle activation technique is and how it targets these sleepy connections.
This is exactly why just trying to strengthen the "weak" muscles often falls flat. You first have to release the tightness that’s holding them back.
The great news is that targeted, mindful movement can make a huge difference. For instance, research has shown that even abbreviated 30-minute Pilates sessions can produce equivalent improvements in shoulder and neck alignment for those with upper-crossed syndrome when compared to longer 60-minute workouts. It's about the quality of the work, not just the time spent. Recognizing these anatomical root causes is the foundational first step toward building a corrective strategy that actually works for the long haul.
How to Assess Your Own Muscle Balance at Home
Ready to play detective with your own body? The very first step in correcting muscle imbalances is understanding your unique patterns. And no, you don't need a fancy lab or expensive equipment—just a little space and your full attention. These simple self-tests are designed to reveal the compensation strategies your body has been using, probably for years.
By simply observing how you move, you can start to pinpoint which muscles are doing too much work and which ones have been slacking off. This isn't about judging yourself. It’s about gathering crucial anatomical data. Think of it as creating a map that shows you exactly which tight, dominant muscles need to be released and which sleepy, inhibited ones need a wake-up call.
As you move through these assessments, a clear picture of your body's tendencies will start to emerge. Most of the time, these imbalances are a direct result of our daily routines—sitting at a desk, always carrying a bag on the same shoulder, you name it.
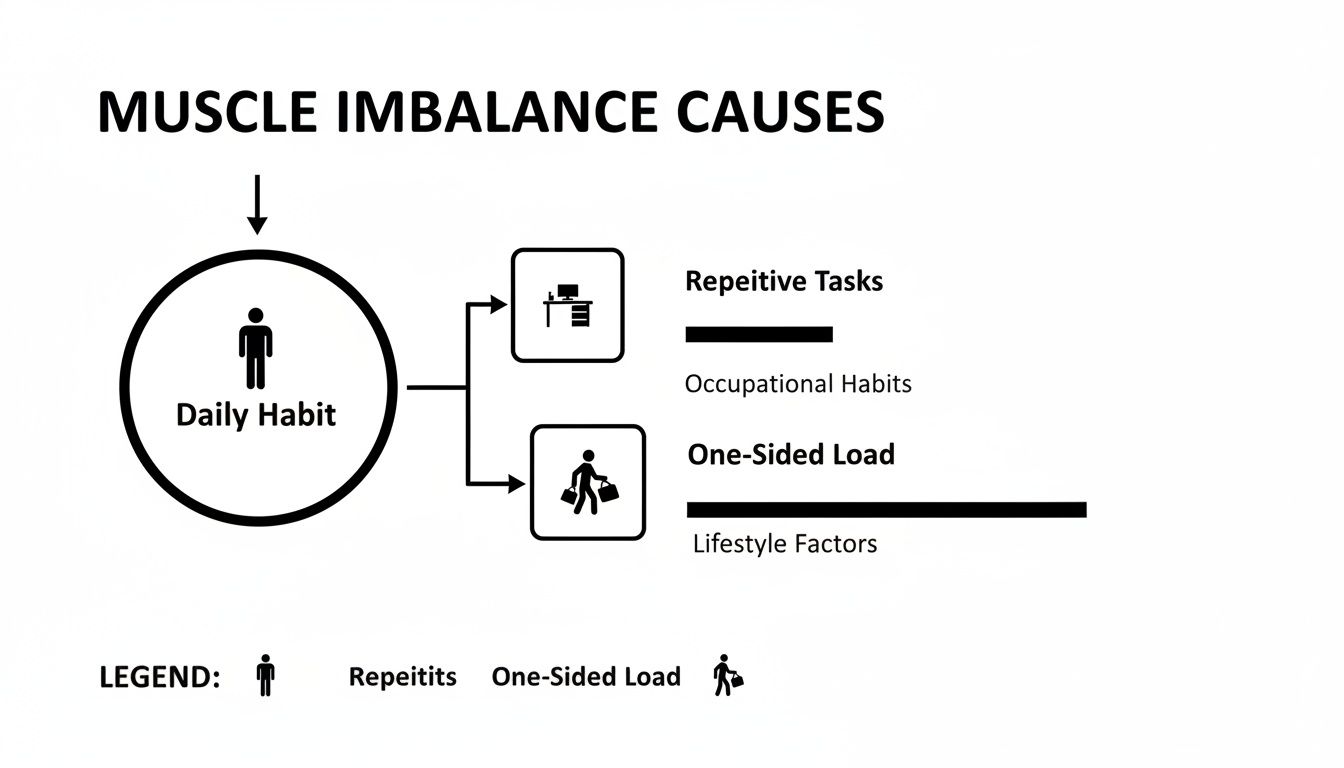
This simple visual really drives home how those seemingly harmless habits are often the root cause, branching out into predictable patterns of strain.
The Overhead Squat Assessment
The overhead squat is a fantastic full-body assessment that can expose limitations all the way from your ankles up to your shoulders. It challenges your entire kinetic chain, quickly showing you where things start to break down.
First, let's do the test:
- Stand with your feet about shoulder-width apart, toes pointing straight ahead.
- Raise your arms straight overhead, trying to keep your biceps in line with your ears.
- Slowly lower yourself into a squat like you’re sitting back into a chair. Go as low as you can without pain.
- Pay close attention to every little thing your body does on the way down and back up.
Now, what did you notice? Let's break down the common compensations.
- Do your heels lift off the floor? This is a classic sign of tight calf muscles (your gastrocnemius and soleus) restricting ankle dorsiflexion. When your ankles can't give you the range you need, your body cheats by lifting the heels.
- Do your knees cave inward? We call this "knee valgus," and it often points to overactive inner thigh muscles (adductors) pulling the knees in, combined with weak or inhibited gluteus medius and maximus muscles on the outside of your hips. Your glutes are supposed to keep your knees tracking right over your toes.
- Does your lower back arch excessively? This is a huge one. It usually means you have tight hip flexors (psoas, rectus femoris) and overactive spinal erectors. To get deeper into the squat, your body arches the lumbar spine instead of flexing at the hips. This pattern is a hallmark of anterior pelvic tilt. If that sounds familiar, you can dive deeper in our guide on how to fix anterior pelvic tilt.
- Do your arms fall forward? This points to tightness in your latissimus dorsi and pectoral muscles, paired with weakness in the mid and lower trapezius muscles—the ones responsible for scapular stabilization and depression.
Single-Leg Stance Test
Next up is a deceptively simple test that tells us a ton about your hip stability. The single-leg stance is incredibly revealing, especially when it comes to the strength of your lateral hip muscles, like the gluteus medius.
Just stand in front of a mirror, lift one foot off the ground, and bring that knee up to hip height. Try to hold it for 30 seconds. The whole time, watch your hips like a hawk.
What you're looking for is a "hip drop"—where the hip of your lifted leg sinks toward the floor. This is a telltale sign that the gluteus medius on your standing leg isn't firing properly to keep your pelvis level. This one little weakness can contribute to a whole host of issues, from low back pain to IT band syndrome.
Wall Slide Scapular Control Test
Finally, let's check in on the muscles that control your shoulder blades, or scapulae. How well these muscles work is absolutely essential for healthy, pain-free shoulders.
Here's how to do it:
- Stand with your back flat against a wall, with your feet about six inches away from it.
- Bend your elbows to 90 degrees and press your forearms and the backs of your hands into the wall. Try to relax your shoulders away from your ears.
- Slowly, and with a lot of control, slide your arms up the wall. Your goal is to keep your forearms and hands in contact the whole time.
The main thing to watch for here is whether your shoulders hike up toward your ears (scapular elevation). If you feel your upper trapezius muscles taking over immediately, it’s a clear sign they are overcompensating for weak lower traps and a sleepy serratus anterior. This is an extremely common imbalance for anyone who spends time at a desk, and it's a major contributor to neck tension and shoulder impingement.
By taking just a few minutes to run through these three tests, you've created your own personalized anatomical blueprint. You now have a much better idea of which areas need more mobility and which muscles need to be woken up with dedicated activation work.
A Practical Progression of Corrective Pilates Exercises
Now that you've done your self-assessment, you have a much better map of your body’s unique tendencies. It’s time to put that insight to work. Fixing imbalances isn’t about just doing random exercises; it's about following a smart, strategic sequence that re-educates your body from the ground up.
We follow a simple but powerful three-phase approach. First, we release the tight, overactive muscles. Next, we wake up their weak, underused partners. Finally, we bring them all together in coordinated, functional movements.
Phase One: Mobility To Release Overactive Muscles
Our first job is to gently quiet down the muscles that are doing too much. Think of this as hitting a "reset" button for your nervous system. By creating some slack, we give the weaker muscles a chance to finally get a word in.
If you’re dealing with classic desk posture, that means we're going straight for the chest and hip flexors.
-
Pectoralis Minor Release: Lie on your back and place a small ball or even a rolled-up towel just under your collarbone, near the shoulder. Just let your body weight sink into it and breathe. This gets into the pectoralis minor, a small but mighty muscle that pulls your shoulder forward and down, creating that rounded look.
-
Kneeling Hip Flexor Stretch: Get into a half-kneeling lunge and gently tuck your tailbone. You should feel a nice opening along the front of your back leg's hip. This lengthens the iliopsoas and rectus femoris—two muscles that get incredibly short and tight from sitting all day, pulling your pelvis into an anterior tilt.
Remember, the goal here isn't to force an aggressive stretch. It's about a mindful release. You're simply inviting these chronically tight muscles to let go, which is the crucial first step to activating their counterparts.
Phase Two: Activation To Awaken Inhibited Muscles
With the dominant muscles quieted, we can finally wake up their sleepy partners. This phase is all about precision and control. We're using low-load exercises to re-establish a clear line of communication between your brain and these forgotten muscles. It’s here that you truly start building a strong mind-muscle connection.
Our primary targets are the glutes and mid-back stabilizers.
-
Glute Bridge: Lying on your back with your knees bent, the entire focus is on squeezing your glutes to lift your hips. The goal is to feel your gluteus maximus fire up first, not your hamstrings or erector spinae. Popping a resistance band around your thighs is a great trick to engage the gluteus medius and stop your knees from caving in.
-
Prone "Y" Lifts: Lie face down, arms extended overhead in a "Y" shape with your thumbs pointing up. Without arching your lower back, lift your arms just an inch or two. This is so good for targeting the lower trapezius muscles, which are absolutely essential for scapular depression and upward rotation.
This kind of precise work really pays off. A recent clinical study on Pilates showed just how effective this approach can be.
Pilates Intervention Outcomes by Muscle Group
Data from a clinical study shows percentage improvements across key muscle groups after a 12-week Pilates program.
| Muscle Group | % Improvement |
|---|---|
| Abdominal Strength | 30.81% |
| Lower-Limb Function | 23.41% |
| Low Back/Hamstring Flexibility | 12.63% |
| Balance | 7.57% |
These are not small changes; they represent a significant boost in functional strength and stability, demonstrating how targeted activation can truly rebalance the body. You can dig deeper into these Pilates-driven strength gains in the full study.
Phase Three: Integration To Build New Patterns
We've released the tight spots and awakened the sleepy muscles. Now it's time to put it all together. This final phase is where you teach the entire system to work as a cohesive, harmonious team, cementing those new, more balanced movement patterns.
The focus shifts from isolating single muscles to coordinating them in a compound movement.
The WundaCore-Informed Squat
The squat is the perfect movement to practice integration. Using a tool like our WundaCore Resistance Ring gives you immediate, tactile feedback to keep your form on point.
-
Setup: Hold the ring in front of your chest and apply gentle inward pressure. This instantly lights up your pecs and serratus anterior, which helps set and stabilize your shoulder girdle.
-
Descent: As you lower, think about sending your hips back and down. Concentrate on keeping your knees tracking right over your second toe (there's your glute activation!) while your core keeps your spine neutral.
-
Ascent: Drive through your heels, feeling your glutes and quads fire at the same time to power you up. The ring provides a great cue to keep your chest lifted, preventing your upper back from rounding as those newly activated lower traps do their job.
This progression—release, activate, integrate—is the anatomical blueprint for correcting muscle imbalances for good. By following this sequence, you’re doing more than just exercising. You're fundamentally reprogramming your body for better alignment, lasting stability, and pain-free movement.
Weaving It All Together: Your Weekly Corrective Pilates Plan
Knowing the "why" behind correcting imbalances—the whole release, activate, and integrate progression—is one thing. But bringing it to life consistently is where the real magic happens. Let's be honest, lasting change doesn't come from a single, perfect workout. It comes from building a smart, sustainable weekly rhythm that your body can actually adapt to.
This isn't about crushing it every single day. It's about designing a routine that prevents burnout while addressing your body’s needs from every angle. We'll strategically balance those laser-focused corrective sessions with more dynamic, full-body Pilates flows. This way, you’re not just fixing problem areas in isolation; you're teaching them how to play nicely as part of a strong, connected team.
Think of it as a simple, intuitive form of periodization. We'll dedicate specific days to certain goals, giving your body the attention it needs without completely overwhelming it.
A Blueprint For Your Week
Let's map out what this looks like in the real world. This is a template, so feel free to shift it around to fit your life. The goal here is consistency, not intensity.
Here's a sample schedule I often give clients to start:
-
Monday (30 mins) — Upper Body Focus: Thoracic Mobility & Shoulder Girdle Stability. This session is all about undoing the "desk slump." You'd start by releasing those chronically tight pecs and lats before moving on to waking up the lower traps and serratus anterior. Think purposeful movements like Wall Slides and Prone "Y" Lifts.
-
Wednesday (30 mins) — Lower Body Focus: Hip Stability & Glute Activation. This is where we tackle the most common lower-body culprits. The session would kick off by releasing overactive hip flexors, then dive right into firing up the gluteus medius and maximus with classics like Clamshells and Bridges.
-
Friday or Saturday (45 mins) — Full-Body Integration: This is your big day where you put all the pieces together. You'll flow through a more dynamic Pilates workout that challenges those newly awakened muscles to work in harmony. This is how you reinforce balanced patterns in bigger movements like squats, lunges, and planks.
This approach ensures you're giving focused attention where it's needed most, without ever losing sight of the big picture.
The Art of Listening: An Anatomical Dialogue
Please, treat this schedule as a starting point, not a rigid set of rules. The most valuable skill you can possibly develop on this journey is learning to listen to what your body is telling you. Some days you'll feel ready to take on the world; other days, a gentle, restorative session is exactly what the doctor ordered.
Think of it as an ongoing conversation with your anatomy. If your lumbar spine is aching after a long day hunched over a laptop, your Wednesday hip session will feel like the perfect antidote. If your neck and shoulders are tight, that Monday upper-body work will feel like a gift.
The goal is to build an intuitive relationship with your body. Modifying your plan based on how you feel isn't a failure—it's a sign of advanced body awareness. And that awareness is the absolute foundation of correcting muscle imbalances for good.
What a 30-Minute Hip Focus Session Looks Like
So, what exactly happens in one of these shorter, targeted sessions? Let's break down a 30-minute routine for hip stability, following our release-activate-integrate model.
Phase 1: Release (5 minutes)
- Foam Roll Quads & TFL: Spend 60-90 seconds on each side, focusing on the front and outer part of your thigh. Make sure you're breathing deeply to encourage the muscles to let go.
- Kneeling Hip Flexor Stretch: Hold for 30 seconds per side. The key here is a gentle pelvic tuck to deepen the stretch right where you need it, without arching your low back.
Phase 2: Activation (15 minutes)
- Clamshells with a Resistance Band: 2 sets of 15 reps per side. Really focus on initiating the movement from that deep glute muscle (your glute medius), not by rocking your whole body.
- Glute Bridge: 2 sets of 15 reps. Squeeze your glutes to lift your hips, keeping your core drawn in so your lower back doesn't try to take over the job.
- Side-Lying Leg Lifts: 2 sets of 12 reps per side. Keep the movement small and incredibly controlled to isolate the hip abductors. It’s not about how high you can lift!
Phase 3: Integration (10 minutes)
- Bodyweight Squats with WundaCore Ring: 2 sets of 10-12 reps. Using the ring here is fantastic for cueing an open chest and stable shoulders, while your brain focuses on tracking your knees over your toes—a direct result of that glute activation work you just did.
- Walking Lunges: 1 set of 10 reps per leg. This is where we challenge your single-leg stability and integrate all that hard work into a functional, real-world movement pattern.
This structure is both incredibly effective and efficient. In fact, this kind of targeted Pilates work has shown impressive results in clinical settings. Studies on middle-aged women with lower-crossed syndrome revealed that a six-week Pilates program led to measurable functional improvements. It really highlights how valuable it is to start this work early to head off chronic issues down the road. You can dive into the data yourself in this preventive Pilates research paper.
How to Track Your Progress (and When to Back Off)
Fixing muscle imbalances is really about re-teaching your body how to move. And like learning any new skill, you have to check in on your progress to see what's sticking. It’s about more than just feeling less pain—it’s about getting real, measurable feedback to make sure your hard work is actually paying off. This is how we move from just guessing to having a smart, targeted plan.
When you start a new routine, it's so important to effectively track your fitness progress. This isn't just for a motivational boost; it tells you when it's time to change things up. Consistent tracking creates a clear feedback loop, showing you what’s working and what might need a new approach. Without it, you're just flying blind, and it’s way too easy to get stuck or push yourself into an injury.
Go Back to Your Starting Point
The easiest way to see how far you've come is to revisit the tests you did at the very beginning. Every four weeks, carve out some time to repeat those initial self-assessments.
- Overhead Squat Assessment: Does it feel any smoother? Are your heels staying planted on the ground? Do you notice your arms reaching up instead of falling forward?
- Single-Leg Stance: Can you hold your balance for longer, even a few seconds more? Is the hip on your lifted side dropping less?
- Wall Slide Scapular Control Test: Can you slide your arms higher up the wall before your shoulders start creeping up toward your ears?
Jot down what you find in a journal or even a note on your phone. And don't just write down what you see—write down what you feel. Maybe your squat depth looks the same, but for the first time, you can actually feel your glutes firing on the way up. That’s huge. That’s progress.
Progress isn’t always a straight line. Some weeks you’ll feel like you’ve made a massive leap forward. Other times, it might feel like you’re just holding steady. The real magic is in the gradual improvement you see over a month, not day-to-day.
Listening to Your Body’s Red Flags
Knowing when to push forward is only half the battle. You also have to know when to pull back or ask for help. Your body is constantly sending you signals, and learning to read them is one of the most important skills you can develop for preventing injury. Ignoring these signals is the fastest way to turn a minor imbalance into a major, chronic problem.
Keep an eye out for these red flags:
- Sharp, Shooting, or Persistent Pain: That dull ache after a good workout is normal. Sharp, stabbing pain during a movement is absolutely not. If a specific exercise consistently causes that kind of pain, stop doing it.
- Increased Numbness or Tingling: That "pins and needles" feeling can be a sign of nerve irritation. If you notice this during or after your exercises, something isn't right.
- An Imbalance That's Getting Worse: If you can see that one side of your body is getting weaker or your posture is actually worsening despite all your hard work, your routine might be accidentally reinforcing the wrong patterns.
It's critical to learn the difference between DOMS (Delayed Onset Muscle Soreness)—that "good hurt" that shows up 24-48 hours after a workout—and actual joint pain. Muscle soreness is a diffuse, dull ache in the muscle belly. Joint pain is often sharper, located right at the joint, and might come with clicking, grinding, or a feeling of instability. If your joints are consistently talking to you, it's time to listen and make a change.
Your Questions on Muscle Imbalances, Answered
As you start this journey of corrective exercise, it’s natural for a few questions to pop up. Let's tackle some of the most common ones I hear from clients.
How Long Until I See Results From Corrective Pilates?
This is the big one, isn't it? While you'll likely feel a difference in your body awareness and how your muscles fire up within just a few weeks, bigger, visible changes take a bit more patience.
Most people start to see noticeable shifts in their posture and feel a real correction in their imbalances around the 6 to 12-week mark. This gives your brain and muscles enough time to rewire those connections and make new, healthier movement patterns second nature.
Can Pilates Alone Correct Significant Imbalances Like Scoliosis?
Pilates is a fantastic tool for managing the muscle imbalances that come with scoliosis. It's incredibly effective at waking up and strengthening those deep spinal support muscles, like the transverse abdominis and multifidus, which create a natural corset to stabilize your spine.
However, for a structural condition like scoliosis, Pilates works best as part of a team effort. Think of it as a powerful component in a comprehensive plan guided by your physical therapist or medical professional.
What Is The Most Important Muscle Group To Target?
If I had to pick just one area to start with, it would be the deep core and the entire glute complex—your gluteus maximus, medius, and minimus. This is non-negotiable for building a strong foundation.
When these muscles are firing correctly, they create a stable pelvis and a supported lower back. This central stability is the anchor that allows the rest of your body's kinetic chain to fall into better alignment.
Is It Possible To Overdo Corrective Exercises?
Absolutely. With corrective work, more is definitely not better. Your goal isn't to exhaust the muscle; it's to re-educate your neuromuscular system. That requires focus and precision.
Pushing too hard can lead to fatigue, which often makes your body revert to old, faulty movement patterns just to get the job done. This can actually set you back. Always prioritize quality over quantity, and build in rest days for your body to recover and adapt. This smarter approach is also key to how you can prevent sports injuries and keep moving well for the long haul.
Ready to build a smarter, more balanced body? The WundaCore collection, including our patented Resistance Ring and guided Wunda On Demand classes, provides the tools and expert instruction you need to release, activate, and integrate for lasting results. Discover the difference anatomy-informed Pilates can make at https://wundacore.com.