Pilates At Home: An Anatomy-Focused Guide
When you start doing pilates at home, you quickly realize it's about so much more than just going through the motions. To get the incredible results Pilates offers, you have to understand the anatomical principles that make each movement work. Real, lasting strength is built from the inside out, starting with the deep stabilizing muscles that form the foundation of your musculoskeletal system.
The Anatomical Foundation of Home Pilates
Pilates is an intelligent system of movement. It's designed to awaken the deep stabilizing muscles that support your entire axial skeleton—think of it as building the structural framework of a house before you put up the walls. When you're practicing at home, you become your own instructor, so this anatomical knowledge is absolutely essential for achieving results safely and effectively.
This internal focus is what makes Pilates feel so different from other workouts. It’s not about brute force; it’s about neuromuscular re-education, training your body to move with precision, control, and biomechanical efficiency.
Your Body's Natural Corset
At the very center of every Pilates movement is your "powerhouse," or deep core. This isn't just about the superficial rectus abdominis (your "six-pack"). We’re talking about a group of deep muscles that function synergistically, creating a dynamic corset that stabilizes your lumbar spine and pelvis from within.
- Transverse Abdominis (TVA): This is your deepest abdominal muscle. Its fibers run horizontally, wrapping around your midsection like a corset. Learning to engage it is the key to creating intra-abdominal pressure that protects your lumbar vertebrae.
- Multifidus: These are deep, powerful muscles that run along your spine, connecting individual vertebrae. They are crucial for segmental spinal stability, controlling small, precise movements between each bone.
- Pelvic Floor: This group of muscles forms a supportive sling or diaphragm at the base of your pelvis. They work in tandem with your TVA and respiratory diaphragm to manage internal pressure and support your pelvic organs.
When you learn to co-contract this system, you create a strong, stable base that makes every other movement safer and more effective. For a deeper dive into exercises that specifically target this area, our guide on Pilates exercises for core strength is a fantastic starting point.
The Importance of a Neutral Spine
One of the first principles you'll learn in Pilates is to "find your neutral spine." This refers to the natural, gentle curves of your vertebral column—a slight lordotic curve at your cervical and lumbar spine, and a slight kyphotic curve in your thoracic spine.
Working in this position is key because it places the least amount of stress on your spinal discs and ligaments, allowing your stabilizing muscles to function optimally. It's the safest and most biomechanically efficient position from which to build true core strength.
"A neutral spine isn't perfectly flat; it's the position where your vertebrae are stacked for optimal load distribution. Mastering this alignment is the first step toward transforming simple exercises into powerful, body-changing movements."
The global Pilates market was valued at $176.35 billion in 2024 and is projected to hit $420.98 billion by 2030. This incredible growth is fueled by people just like you, creating effective and mindful fitness routines at home.
The image below beautifully illustrates how these principles—neutral spine, breathing, and stability—all work together.
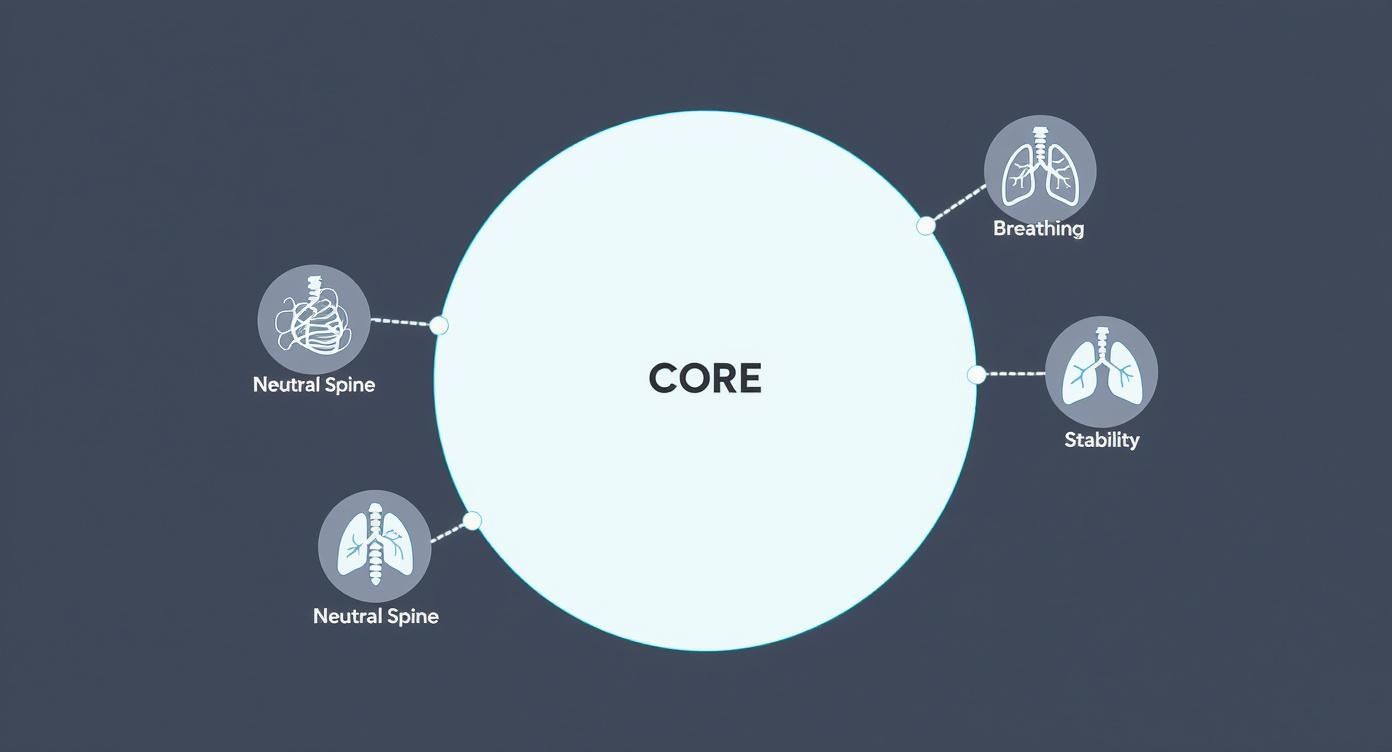
True core strength isn't just about one thing; it's a synergy between spinal alignment, diaphragmatic breath, and muscular stabilization.
Scapular Stability and Breathing
Beyond the core, we also focus on scapular stability. This is the ability to control your shoulder blades (scapulae) on the posterior rib cage, preventing them from "winging" or elevating towards your ears. Proper scapular control, managed by muscles like the serratus anterior and rhomboids, prevents impingement in the shoulder joint and reduces strain on the cervical spine, especially in weight-bearing exercises.
Finally, your breath is the engine for every movement. We use diaphragmatic breathing—a deep, three-dimensional breath into the sides and back of the ribs. This not only oxygenates your muscles but the action of the diaphragm also helps engage your TVA. This breathwork is what connects your nervous system to your muscular system, turning your home workout into a truly mindful practice. Understanding specific spinal movements, including what lateral flexion is, can also add a new layer of precision to your practice.
To help you connect these concepts to your workout, here's a quick look at the key players in your core and what they do.
Core Muscles and Their Function in Pilates
This table breaks down the primary muscles you'll be engaging and why they matter for your home practice.
| Muscle Group | Anatomical Function | Role in Pilates At Home |
|---|---|---|
| Transverse Abdominis | Compresses abdominal contents; stabilizes the lumbar spine. | Acts as your "natural corset," creating a stable base and protecting your lower back. |
| Multifidus | Provides segmental stability to the spine. | Supports individual vertebrae, preventing strain during flexion, extension, and rotation. |
| Pelvic Floor | Supports pelvic organs; helps control intra-abdominal pressure. | Works with the TVA and diaphragm to provide foundational support from below. |
| Internal/External Obliques | Rotate and laterally flex the trunk. | Powers twisting and side-bending movements with control, preventing jerky motions. |
| Rectus Abdominis | Flexes the lumbar spine. | Engaged during "curl" movements, but balanced with deeper core activation. |
By understanding what these muscles do, you can move with more intention, making every exercise on your mat more powerful and effective.
Creating Your Home Pilates Space

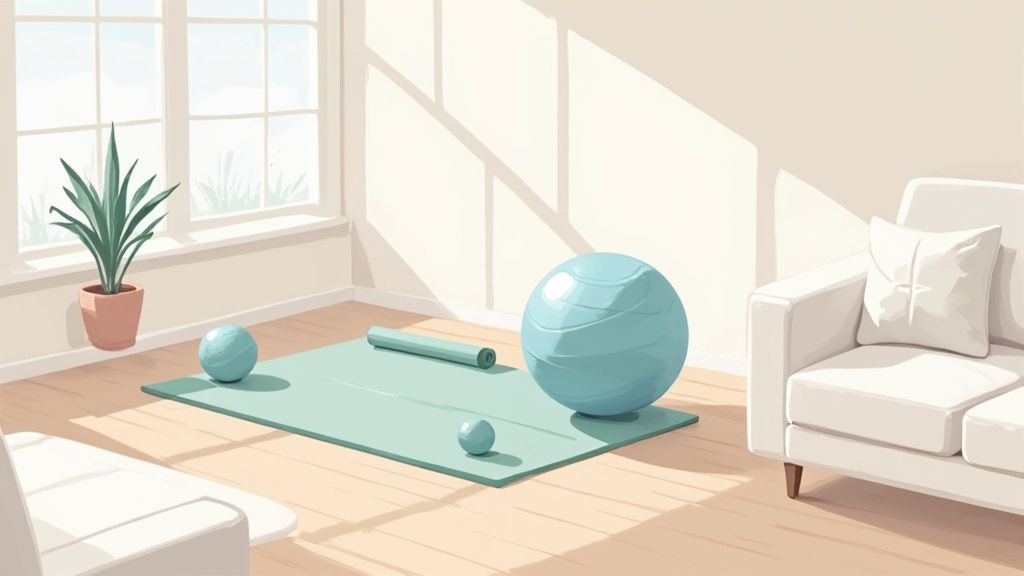
Let's clear something up right away: you do not need a dedicated home gym or a massive reformer to get a powerful, anatomy-focused pilates at home workout. A transformative practice can happen right in the corner of your living room with just a few well-chosen pieces of equipment.
The goal isn't to replicate a studio, but to create a functional, inviting area where you can move freely and connect deeply with your body's mechanics. Think of it as your little sanctuary for mindful movement. All you really need is enough room to extend your arms and legs without bumping into the coffee table—the length of a standard yoga mat is the perfect guideline.
Essential Equipment for Anatomical Depth
Starting a home practice is less about having a ton of gear and more about having the right gear. A few key props can mimic the resistance and support of studio equipment, dramatically deepening your connection to the specific muscles we want to target.
These are the essentials that give you the most anatomical bang for your buck:
- A Supportive Mat: This is your foundation. I always recommend a mat that's a little thicker than a standard yoga mat. That extra cushioning protects your vertebral spinous processes during rolling exercises.
- Resistance Bands: Your secret weapon for mimicking the spring tension of a reformer. A light-to-medium band is perfect for activating smaller stabilizing muscles, like the rotator cuff muscles (supraspinatus, infraspinatus, teres minor, and subscapularis) or the gluteus medius.
- A Small Pilates Ball: This simple tool is incredible for proprioceptive feedback. Squeezing it between your knees during ab work instantly helps you recruit your adductor muscles and pelvic floor. Placing it under your sacrum can also intensify core work by creating an unstable surface that challenges your deep stabilizers.
- Glider Discs: These unassuming little discs introduce a significant stability challenge. When you use them under your feet for a plank or lunge, your deep core stabilizers have to fire isometrically to prevent unwanted movement. It's how you build true, functional strength.
As you think about setting up your space, you might find more ideas by exploring other essential home gym equipment that can complement your Pilates routine.
How Props Target Specific Muscles
Let's put this into a real-world context. Imagine you’re doing a classic side-lying leg lift series to strengthen your hip abductors. With just your body weight, it's a great exercise.
Now, add a resistance band around your thighs.
Everything changes. Suddenly, you aren't just lifting your leg; you're actively pressing against external resistance. This immediately forces your gluteus medius and minimus—the key stabilizers for your pelvis—to contract more intensely. The band provides constant tension through the entire range of motion, creating the deep muscle fatigue that stimulates strength gains.
This is the entire point of using props at home. They give your muscles something specific to work against, sharpening that neuromuscular connection and ensuring the target muscles are performing the work.
This shift toward smarter, more effective home workouts is something we're seeing everywhere. The global Pilates equipment market, which covers both studio and home gear, was valued at around $250 million in 2024 and is expected to hit $438.08 million by 2030. A huge piece of that growth comes from people just like you, looking for versatile tools to use at home.
Setting Up in a Small Space
Even if you're in a tiny apartment, you can absolutely carve out a functional workout zone. It’s all about smart organization and multi-purpose thinking.
- Go Vertical: A few simple wall hooks or a sleek shelf can keep your mat, bands, and ball off the floor. When your equipment is organized and in sight, you’re so much more likely to actually use it.
- Use Under-Furniture Storage: Find a low-profile basket or bin that can slide right under your sofa or bed. It keeps your props out of sight but still super easy to grab when you're ready to move.
- Create a Ritual: Designate your spot. Maybe it's that little patch of floor in front of a sunny window. Rolling out your mat in the same place every time sends a signal to your brain that it's time to switch gears, focus, and move.
By being intentional with just a few key items and a dedicated corner, you can create a powerful space for your pilates at home practice. To dive deeper into selecting the best tools, check out our guide on choosing Pilates equipment for your home.
Your Progressive Home Pilates Workout Plan
Alright, it's time to put all that amazing anatomical knowledge into practice. A truly effective pilates at home routine isn't just about stringing together a few exercises you saw online. It’s a purposeful journey, one that meets you where you are today and intelligently guides you toward greater strength and motor control.
I’ve designed this plan to build your strength from the inside out, ensuring every single movement is safe, effective, and builds upon the last. We’ll move through three distinct levels: the Foundation, the Challenge, and the Integration. The real key here is to truly master the focus of one level before you even think about moving on to the next. Let's get started.
Level 1: The Beginner Foundation
Your entire focus here is on building a solid mind-muscle connection. Forget about speed or reps. This is about proprioception—learning to feel the right muscles firing at the right time. We’re zoning in on your deep core stabilizers—the transverse abdominis (TVA), pelvic floor, and multifidus—while maintaining a perfectly neutral spine.
Honestly, this foundational work is the most critical part of your entire Pilates journey. Master these neuromuscular patterns, and everything that comes after will be exponentially more powerful.
Sample Beginner Workout (15-20 Minutes)
- Breathing & TVA Activation (3 minutes): Lie on your back in a supine position, knees bent and feet flat. Find your anterior superior iliac spine (ASIS) with your fingertips and slide them medially about an inch. Take a deep diaphragmatic breath, and as you exhale, gently draw your navel toward your spine. You should feel the muscles under your fingertips gently firm up. That's your TVA contracting.
- Pelvic Curls (10 repetitions): Staying in that same position, exhale to engage your core and posteriorly tilt your pelvis, pressing your lumbar spine into the mat. From there, sequentially articulate your spine off the floor, one vertebra at a time, until you're resting on your scapulae. Inhale at the top, and then exhale to slowly roll back down with just as much control. You should feel your glutes and hamstrings initiating the lift, stabilized by your deep abdominals.
- Toe Taps (8 repetitions per side): Maintain a neutral spine and TVA engagement. Float one leg up to a tabletop position (90-degree angle at the hip and knee), then bring the other up to meet it. As you exhale, slowly lower one toe to gently tap the mat, ensuring the movement is pure hip extension and not lumbar extension. Inhale to return. Your TVA must work isometrically to prevent your back from arching.
The beginner phase isn't about getting breathless; it's about re-educating your body's motor patterns. You're literally teaching your brain to communicate with deep muscles that may have been dormant. Master this communication, and you build a rock-solid foundation.
Level 2: The Intermediate Challenge
Once you can co-contract your deep core without conscious thought, you’re ready to introduce instability and coordination challenges. This is where we start adding more complex sequences that demand multiple muscle groups to cooperate. We'll also begin to add movements that challenge your center of gravity, forcing your core to work overtime to maintain control.
Sample Intermediate Workout (20-25 Minutes)
- Hundred Prep with Ball (10 breath cycles): Lie supine with a small Pilates ball under your sacrum. Bring both legs to tabletop. Exhale as you perform a thoracic curl, lifting your head and shoulders off the mat. Reach your arms long and begin pumping them vigorously for a five-count inhale and a five-count exhale. The unstable ball will force your obliques and TVA to fire intensely to maintain pelvic stability.
- Side-Lying Leg Series with Band (10 repetitions per side): Lie on your side with a resistance band looped around your thighs. Stack your hips vertically. Lift your top leg against the band's resistance (hip abduction), then perform small, controlled circles in each direction. You’ll feel this deep in your outer hip, targeting the crucial pelvic stabilizer, the gluteus medius.
- Plank to Pike on Gliders (8 repetitions): Begin in a high plank with your feet on glider discs. On an exhale, use your deep abdominals to pull your hips up toward the ceiling into a pike position (hip flexion), sliding your feet in. Inhale as you control the eccentric movement back to a strong plank. This is an intense challenge for your entire anterior core chain and your shoulder stabilizers (serratus anterior and rotator cuff).
The desire for more dynamic home workouts like these is booming. The global at-home Pilates equipment market is surging, with projections showing it could hit an estimated $2.7 billion in 2025. This just shows how many people are discovering the power of a well-equipped, progressive home practice. You can read more about the trends shaping the at-home Pilates market to see why this movement has so much momentum.
Level 3: The Advanced Integration
Welcome to the advanced level. The focus here shifts to dynamic, full-body integration. Think larger ranges of motion, more complex choreography, and fluid, seamless transitions. We're challenging your strength, stability, balance, and motor control all at once to build the kind of deep, functional strength that improves biomechanics in every aspect of your life.
Sample Advanced Workout (25-30 Minutes)
- Teaser (8 repetitions): Start lying supine with your legs extended at a 45-degree angle. Inhale to prepare. On your exhale, sequentially roll up through your spine, reaching your arms toward your toes to create a "V" shape. Inhale to hold this isometric position, then exhale to slowly and deliberately roll back down, articulating each vertebra. This is the ultimate test of abdominal strength and spinal control.
- Side Bend with Rotation (6 repetitions per side): Sit on one hip with your legs stacked. Place one hand on the floor and the other behind your head. Press up into a side plank, creating one long line from your feet to your head. Exhale as you perform a thoracic rotation, bringing your top elbow toward the floor. You'll feel an intense eccentric and concentric contraction in your obliques, quadratus lumborum, and shoulder stabilizers.
- Control Balance (5 repetitions per side): From a seated position, roll back onto your scapulae, extending both legs toward the ceiling. Hold onto one ankle as you eccentrically lower the other leg toward the floor with absolute control. Then, switch legs with a smooth, seamless motion. This move demands massive core control, hamstring flexibility, and scapular stability.
Sample Workout Progression At a Glance
To help you visualize the journey and pinpoint your starting line, here’s a quick breakdown of how the focus and exercises evolve.
| Workout Level | Primary Anatomical Focus | Sample WundaCore Exercise |
|---|---|---|
| Beginner | Deep Core Activation & Neutral Spine | Pelvic Curls |
| Intermediate | Stability, Coordination & Added Resistance | Side-Lying Leg Series with Band |
| Advanced | Full-Body Integration & Dynamic Control | Teaser |
This table clearly shows the logical path from establishing your foundation to challenging it with instability, and finally, integrating it all into powerful, flowing movement.
By moving through these stages with intention, your pilates at home practice becomes a smart, sustainable method for building a body that's not just strong, but truly resilient and powerful from the inside out.
Nailing Your Form and Ditching Common Mistakes
When you're doing Pilates at home, you become your own instructor. You don't have a teacher's tactile cues to tweak your alignment, which makes mastering your form the single most important thing you can do for both safety and results. Think of this as your virtual spotter—I’m here to help you troubleshoot the most common form compensations by understanding why they happen.
Getting your form right isn't about looking perfect. It’s about ensuring the correct muscles are firing to protect your joints and build the deep, functional strength Pilates is known for. When you learn to spot and correct these habits, every single movement becomes more powerful.
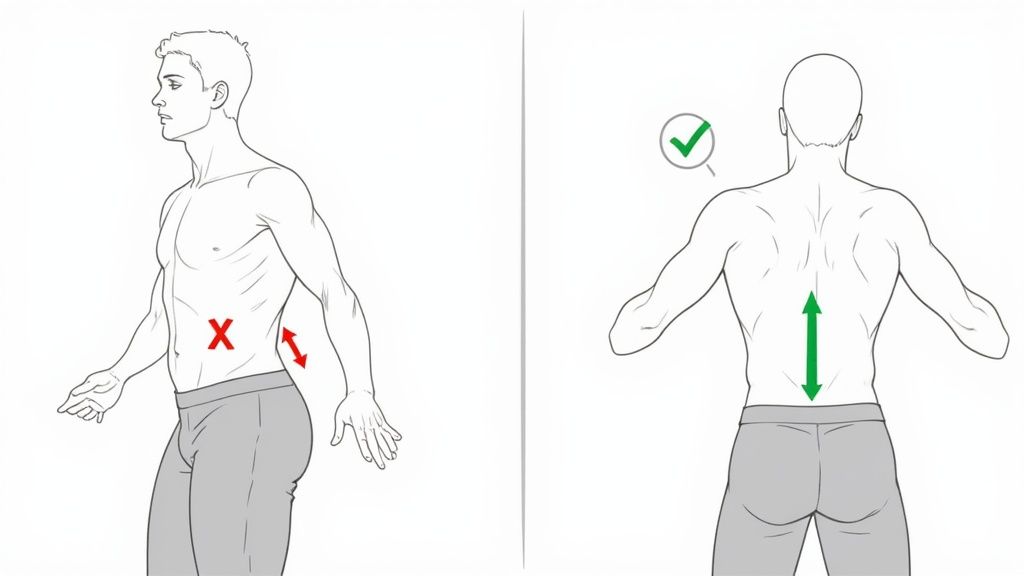
The Arching Lower Back Dilemma
This is probably the most frequent compensation I see, especially during abdominal work: the lumbar spine goes into hyperlordosis (an excessive arch) and lifts off the mat. It’s a huge red flag that your deep core has disengaged and your hip flexors are dominating the movement.
When your hip flexors—especially the psoas, which connects your femur to your lumbar spine—take over, they pull your lumbar vertebrae forward into an arch. This not only cheats your abdominals out of a workout but can also lead to significant lower back strain.
The Anatomical Fix
The antidote is to re-engage your transverse abdominis (TVA). This is your body's built-in corset, and when it’s engaged, it instantly stabilizes your pelvis and spine.
- Get Hands-On: Before you start an ab exercise, place your fingertips medial to your ASIS (hip bones). As you exhale, imagine you're gently drawing your navel back towards your spine. You should feel the muscle under your fingers firm up. That’s the TVA.
- Imprint Your Spine: Intentionally and gently press your lower back into the mat to create a posterior pelvic tilt. This "imprinted" spine helps you find and maintain your deep core connection, preventing the hip flexors from hijacking the movement. It's a fantastic modification for any ab work until you've built the strength to hold a neutral spine under load.
Shoulders Creeping Up to Your Ears
Ever find your shoulders elevating towards your ears during planks, push-ups, or any arm-heavy exercise? It’s a classic compensation pattern. It means you're over-relying on your upper trapezius muscles instead of the larger, more powerful muscles of your back and shoulder girdle.
This not only creates excessive tension in your cervical spine but also destabilizes your entire shoulder girdle, making the exercise less effective.
The Anatomical Fix
The key here is to activate your latissimus dorsi (lats) and serratus anterior. Your lats are the large, wing-like muscles in your back, and your serratus anterior helps protract your scapulae, holding them snugly against your ribcage.
Think about sliding your scapulae down and back, away from your ears, as if you're tucking them into your back pockets. This single action engages the lats and creates space and stability around your neck and shoulder joints.
To really feel it, try this: press your hands firmly into the mat and imagine you're trying to externally rotate your shoulders without actually moving your hands. You'll feel those back muscles kick in to secure your scapulae, giving you a rock-solid foundation for your upper body.
Gripping with Your Hip Flexors
Have you ever finished a set of ab work and felt it more in the front of your hips than your actual stomach? That’s a tell-tale sign of "gripping" with your hip flexors (psoas and rectus femoris). It happens when these muscles try to "help" your abdominals, usually because the core isn't quite strong enough for the load on its own.
This pattern leads to hypertonic (overly tight) hip flexors and an under-worked core.
The Anatomical Fix
The solution is to consciously inhibit your hip flexors while deepening that core connection.
- Shorten Your Lever: If you're doing something like leg lowers, don't lower your legs as far. Stop the moment you feel your lumbar spine begin to arch or your hips tense up. A smaller, controlled range of motion is a thousand times more effective than a large, compensatory one.
- Use a Prop for Feedback: Grab a small Pilates ball and place it between your knees. Gently squeezing it activates your adductors and pelvic floor, which reciprocally inhibits the hip flexors, allowing your deep abdominals to finally take center stage.
Becoming your own form detective and using these simple anatomical cues will completely change your Pilates at home practice. You'll build strength more safely and efficiently, and you’ll finally ensure every single movement counts.
Building a Consistent Home Practice
The real magic of a pilates at home practice doesn't happen in one perfect session. It’s found in the quiet commitment of showing up for yourself, day after day. This consistency is what truly builds deep functional strength, rewires your neuromuscular patterns, and turns your workout into a non-negotiable habit.
This isn’t about pushing to failure every single day. Far from it. It's about finding an intelligent rhythm that works with your body's physiology. When you learn to listen to your body's signals and structure your week with intention, your practice starts to feel less like a chore and more like an essential part of your well-being.
Designing Your Weekly Practice
One of the biggest mistakes is going all-out every time you hit the mat. A much smarter approach is to periodize your workouts, balancing effort with recovery. This gives your muscle fibers the time they need to repair and rebuild stronger.
Aim for three to four sessions a week, but vary the intensity and focus. This keeps your body challenged and your mind engaged.
Here’s what a balanced week might look like:
- Monday: A full-body strength day. This is where you might tackle those intermediate or advanced exercises that really challenge your core and major muscle groups.
- Wednesday: A shorter session focused on mobility. Think gentle Cat-Cows for spinal articulation, movements for hip joint mobility, and exercises for scapular stability.
- Friday: Another strength day, but with a different focus. Maybe you zero in on the obliques and gluteus medius to build better stability in the frontal plane.
- Sunday: A gentle flow or dedicated stretch session. This is perfect for releasing fascial tension and preparing your body for the week ahead.
This kind of schedule honors your body's need for both work and rest—that's the real secret to making long-term progress.
Listening to Your Body’s Anatomical Cues
Your body is constantly providing biofeedback; you just have to learn its language. This is your best guide for knowing when to push harder and when to ease up. It’s about understanding the crucial difference between productive muscle fatigue and potential injury.
Good soreness—often called Delayed Onset Muscle Soreness (DOMS)—feels like a deep, satisfying ache in the belly of the muscles you worked. Think about your glutes after a challenging side-lying leg series. Bad pain, on the other hand, is sharp, pinching, or localized in a joint, like a sudden twinge in your lumbar spine during an ab exercise.
If you feel that "good" soreness, it's a sign your muscles are adapting. Follow up with a lighter, mobility-focused day. But if you feel sharp pain, that's your body's stop sign. It's time to pull back, regress to a more foundational exercise, and double-check that your deep core stabilizers are firing correctly.
Setting Realistic Goals to Avoid Plateaus
To stay motivated, your goals need to be both inspiring and genuinely achievable. Instead of a vague goal like "get stronger," get specific and anatomical.
Anatomy-Based Goal Examples:
- Form Goal: "I want to hold a full plank for 60 seconds without my lumbar spine arching." This directly targets the endurance of your transverse abdominis and obliques.
- Movement Goal: "I will master the Teaser with control, ensuring initiation from my rectus abdominis and obliques, not my hip flexors." This hones in on precise muscle recruitment and motor control.
Goals like these give your practice a clear purpose and allow you to celebrate small, meaningful wins along the way. To dive deeper into building a routine that sticks, check out our guide on how to stay consistent with exercise.
When you weave together a smart schedule, learn to listen to your body, and set intentional goals, your pilates at home routine transforms from something you simply do into a rewarding, lifelong wellness habit.
Your Home Pilates Questions, Answered
Starting a pilates at home practice is exciting, but it naturally comes with questions. Getting clear on the anatomical "why" behind the movements is the secret to making your practice both safe and incredibly effective. Let's tackle some of the most common things people ask.
How Often Should I Practice Pilates At Home To See Results?
When it comes to seeing real changes in your body—like improved posture and deep core strength—consistency always wins over intensity. My advice? Aim for three to four sessions every week. This gives your body and nervous system the time they need to build muscle memory, allowing muscle fibers to repair and grow stronger.
A great weekly schedule could look like this:
- Two stronger, full-body sessions that challenge you.
- One or two shorter, focused sessions for mobility or activating small stabilizing muscles, like the tiny multifidus in your spine or the rotator cuff in your shoulder.
Above all, listen to your body. That deep muscle ache (DOMS) is a good sign—it means you're creating positive adaptations. Sharp pain, on the other hand, is your body telling you to take a break.
Can I Lose Weight Just By Doing Pilates At Home?
Pilates is a fantastic tool for changing your body composition. It's brilliant for building lean muscle, especially in your deep core, glutes, and back. And the more muscle you have, the higher your basal metabolic rate, meaning your body burns more calories at rest.
However, Pilates is primarily an anaerobic, strength-based workout. If weight loss is a primary goal, the most effective approach is to pair your home Pilates routine with a healthy diet and cardiovascular exercise to create the necessary energy deficit.
What If I Feel Pain In My Lower Back Or Neck?
Pain is almost always your body's signal that it's compensating for something—usually a flaw in form or a muscle that isn't activating correctly.
Think of pain as your body’s internal feedback system. If you feel a strain in your lower back, it's a good bet that your psoas and erector spinae muscles are working overtime because your transverse abdominis has checked out. Neck pain? That’s often the small neck flexors straining to do the work of your deep core.
For Lower Back Pain: Your mission is to reconnect with your transverse abdominis (TVA). Before any movement, exhale and think about gently drawing your navel toward your spine. This simple action stabilizes your pelvis. If you need more support, gently press your lower back into the mat (an "imprinted" spine) to prevent it from arching.
For Neck Pain: During abdominal curls, maintain length in your cervical spine and gaze toward your navel. Use your hands to support the weight of your head, but make sure your lats are engaged (scapulae depressed and retracted). This ensures you aren't creating tension by yanking on your neck. If the pain persists, take a break and regress to a more foundational exercise to perfect your form.
Ready to build a smart, strong pilates at home practice with an expert in your corner? Check out the WundaCore collection and join Wunda On Demand. You'll get access to hundreds of classes designed to build strength from the inside out. Start your journey at https://wundacore.com.